
|
So, I've learned that working in the rain really sucks. When all of your equipment and materials are getting poured on and you're soaking wet, it's just not a fun game. We came back on Friday and put up ¾ of the last two walls. It took about 7 hours for us to get the last two walls drawn out, marked off, cut, nailed and framed up. Not bad for two guys, and one who has virtually no experience with building (me)! Saturday was a washout day, so we decided to do something really important and go drive around looking for ponds and good dirt roads that we haven't had time to discover in the Rangeley area. We found a bunch of cool new places, but sorry guys, I can't share any info! Sunday we put up the last section of wall and then started putting on some sheathing. The Zip system sheathing is so easy to work with, and it's so cool that each board has markings for all of your studs (assuming you're putting everything 16 inches on center). Another cool tip is measure 47 inches from the bottom of your sill plates and make a mark on each end of the wall, and one in the middle so that you can run a chalkline. This way, your sheathing will be one inch below the sill plate to cover them up. Another thing that we figured out with sheathing is making sure that your partitions are insulated before putting up your sheathing! We use two strips of 2 inch foam board that I ripped on the table size at 5.5" in width. I had to leave for the day on Sunday afternoon , so instead of finishing the sheathing we decided to put up the two LVL beams that are in line with the two posts in the crawl space as well as the first floor framing for the bathroom and bedroom. These each span 28 feet and are pretty heavy. We had to get it up on staging then get it into place and nail it together, as well as bolt to the front first floor wall. I made a timelapse video for this process and I'll try to post it, but it's nothing too impressive. See below for some pictures and explanations from our work this past weekend. The next steps are to finish the sheathing, put on the joists and rimboards in the back of the camp for the second floor, and put a final top plate of 2x6 around the whole border. We'll then put up two more LVLs in the kitchen/living room for extra support. In this photo, you can see that the back walls were built with 8' studs and the front were built with 8'10" studs. This is to accommodate for the rimboards, LVL and floor joists for the second floor. 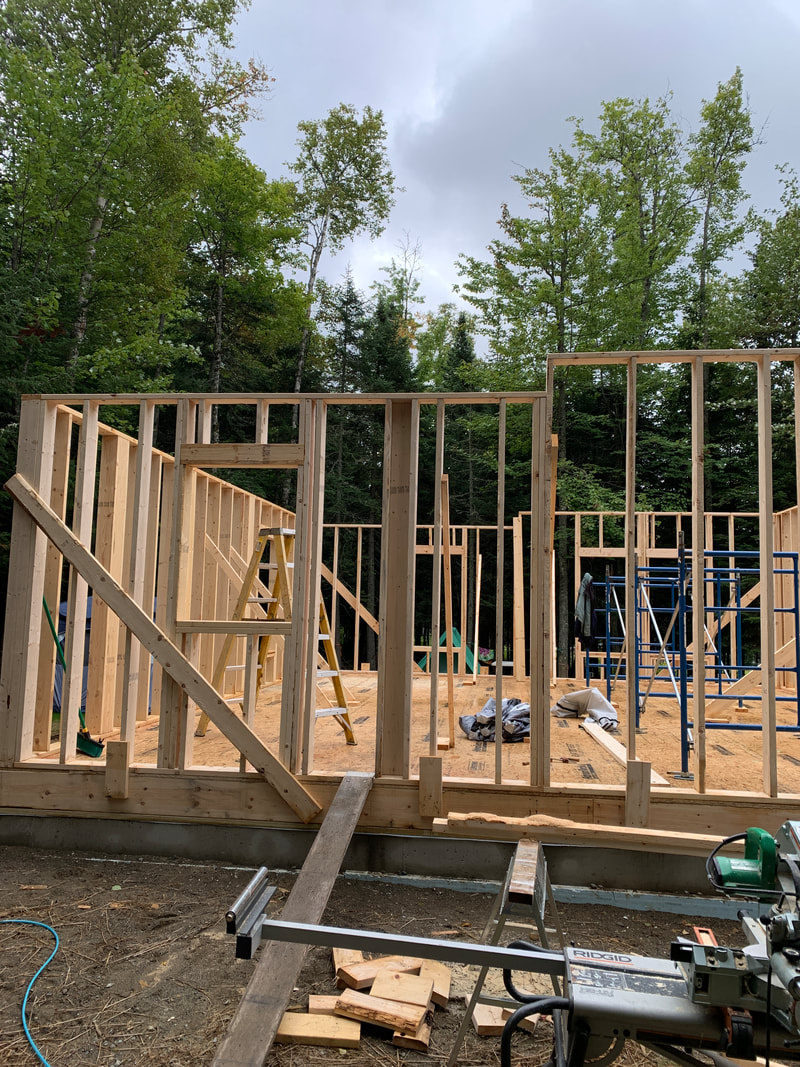 Here's another shot of the uneven wall heights for now 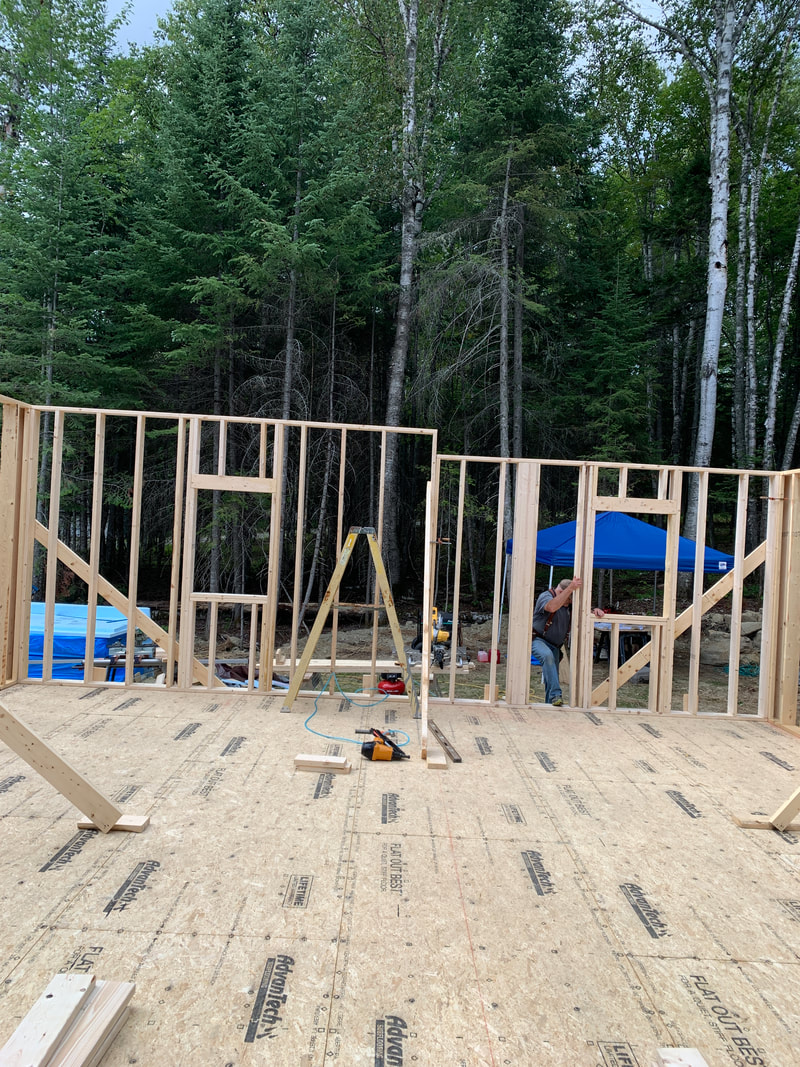 I had explained above how the sheathing is put on. I was curious about how you cut around windows and doors. John just made a simple measurement from the inside and cut it with a circular saw. I let him do this work due to his many years of experience and I didn't want to screw it up :0)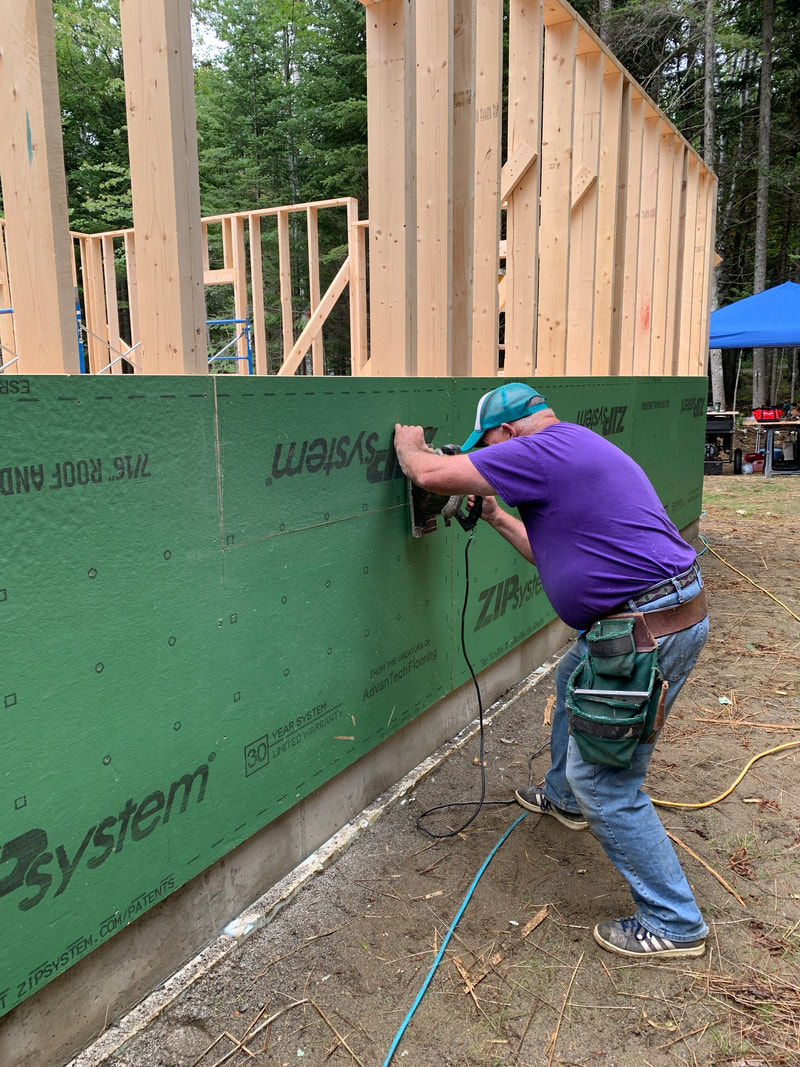 Here's a shot of the front of the camp with the doors and windows cut out and the sheathing started 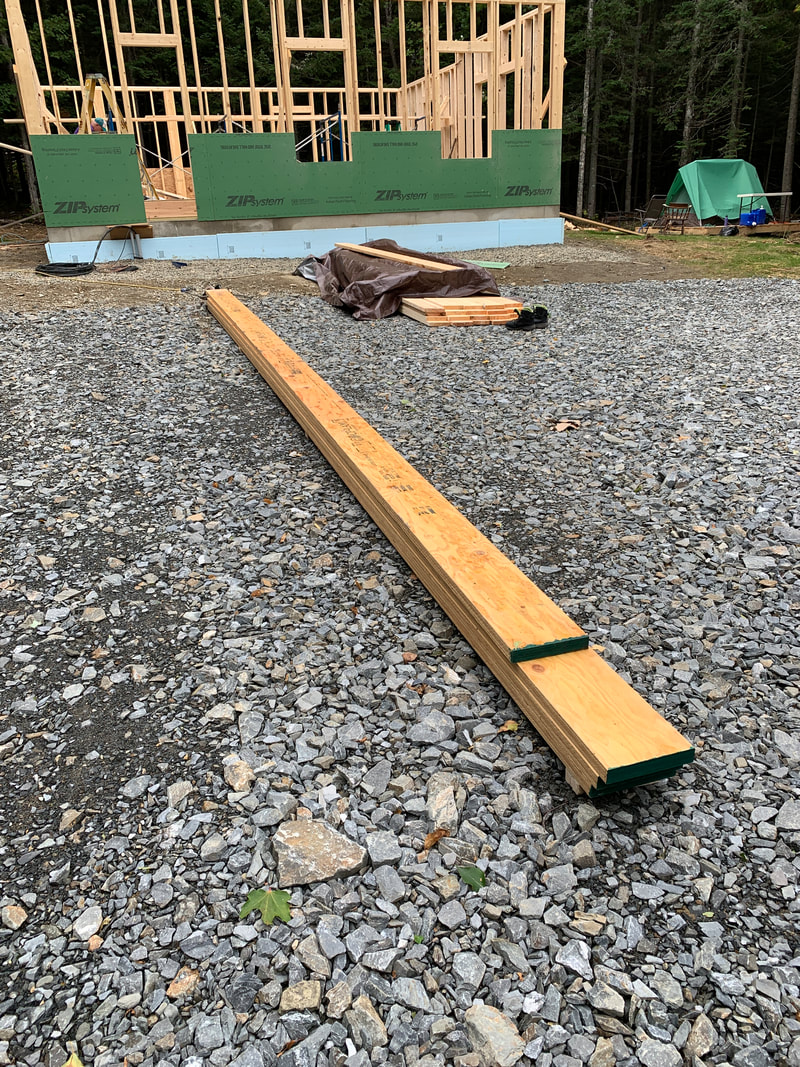 Here you'll see the two LVLs that we lifted up on to the staging. We had originally thought we'd need about 3 guys to lift these, but it wasn't that bad. This LVL will be on top of the first floor interior walls and used for the 2nd floor joists to hang on. We'll measure it out and put on the joists after we get the rimboards up on the back walls. I also never realized how much work it is to get staging put together and set up. On top of that, we needed to buy some extra long (16 ft) 2x10's which isn't super cheap. We're going to need another set of staging once we start getting to the rafters. These LVLs are bolted to the walls at the end also! 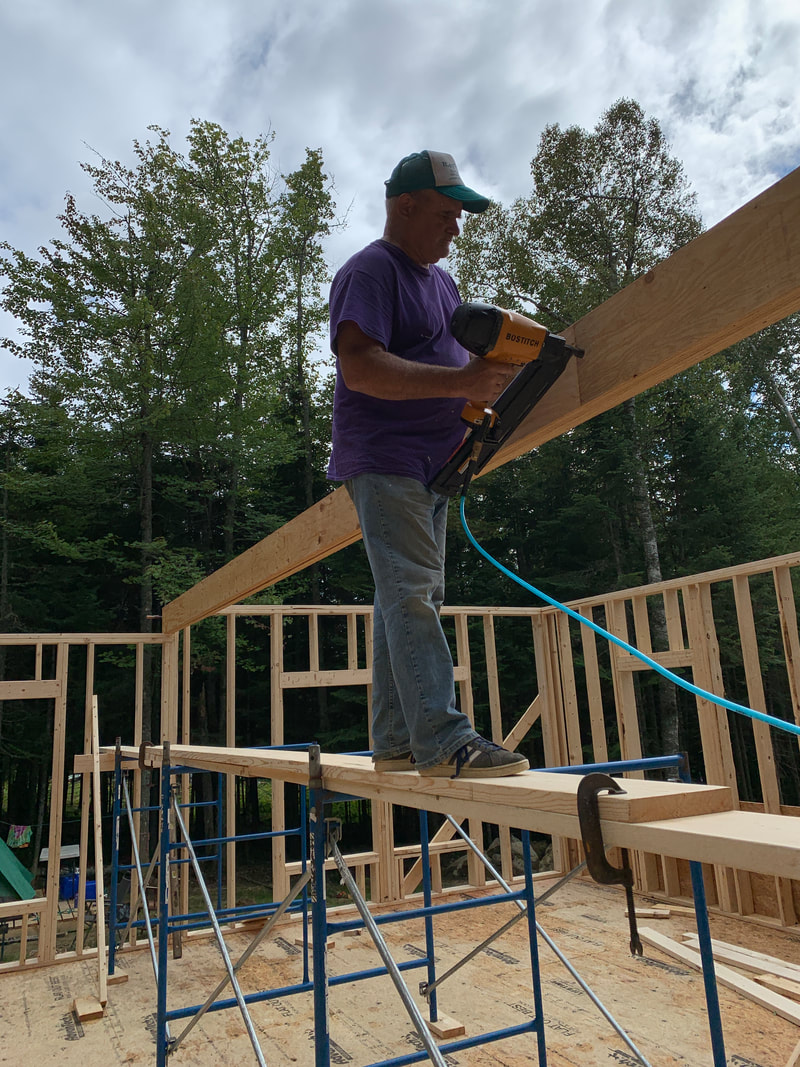 Here was the progress that we made on Sunday. John is working by himself this week finishing up the sheathing and starting to put up the second floor joists. I'm excited to get back up there and see the progress. It'll be great once the roof goes on because we can store tools inside, and I might just start sleeping in there. On a side note, my tent, which had a metal cot and an air compressor in it, flipped over from the 40+MPH wind gusts on Saturday. That was fun to clean up..... #troutcamp 
1 Comment
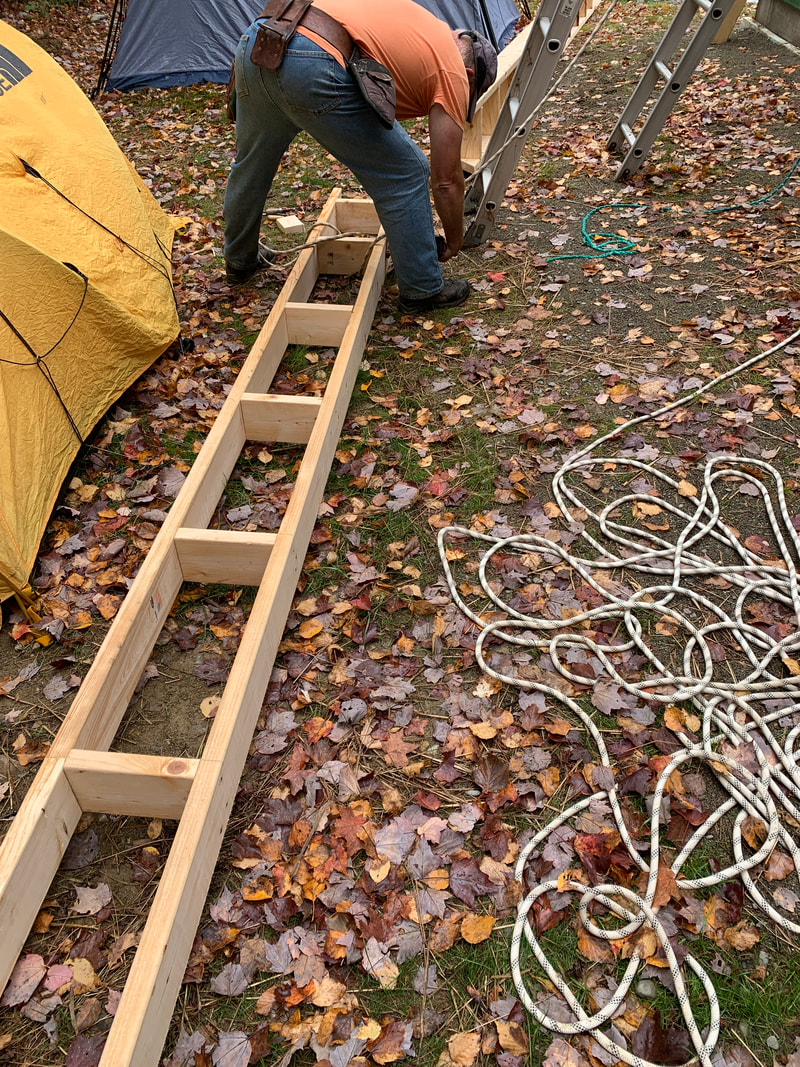 As you can see from the picture above, we're all ready to go. The foundation has been backfilled. The electrical, well and septic lines are set. Time to start building up! As a warning, I am NOT a builder. I had never even used a framing nailer before this project. My Uncle John is the foreman and the brains... he just tells me where to nail. I've learned a tremendous amount throughout the process and am excited to see what else I learn. All I know is that I can see how strong people get who hammer nails for a living. Long days, rewarding work! We decided it was best to put in a turnaround, so one last load of big crushed rock for the driveway was needed! 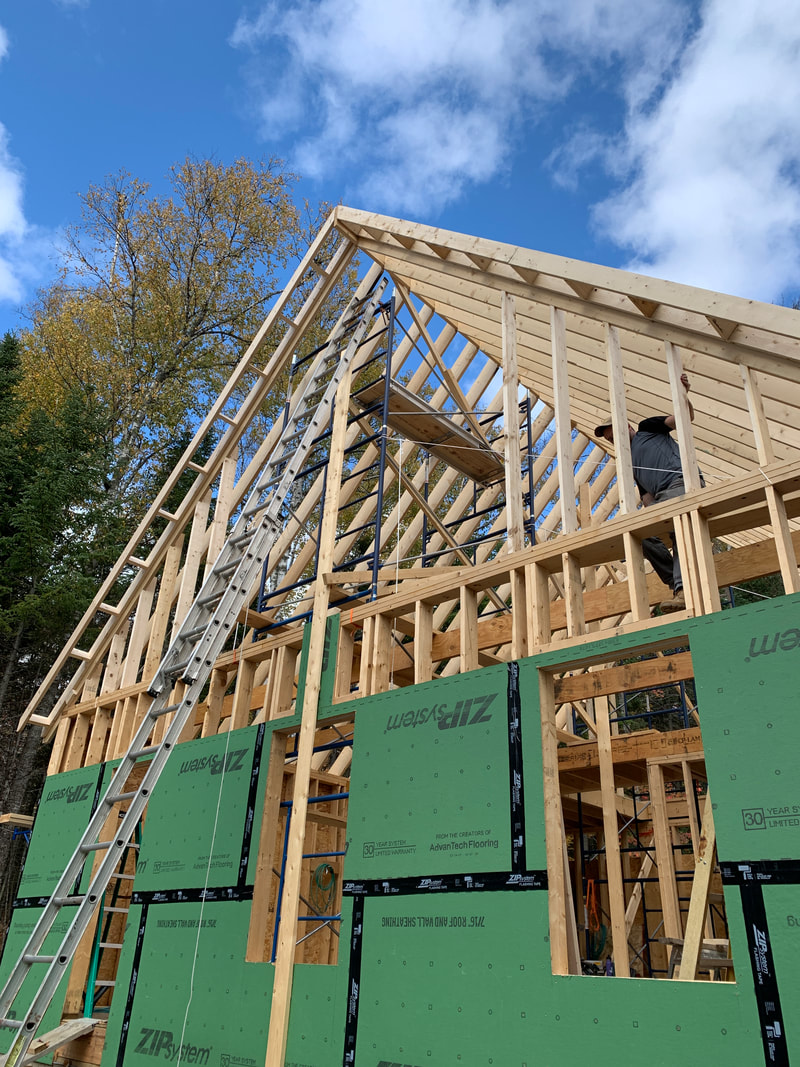 The first step before laying any wood is putting sill seal around the outside. The pressure treated sill plates sit on top of this.  We measured out the holes and used a 1/2" bit to bore them out. It was pretty easy going down. Once you put them on, you screw the nut on the bolts. Easy as that. Here's John with the first board laid! 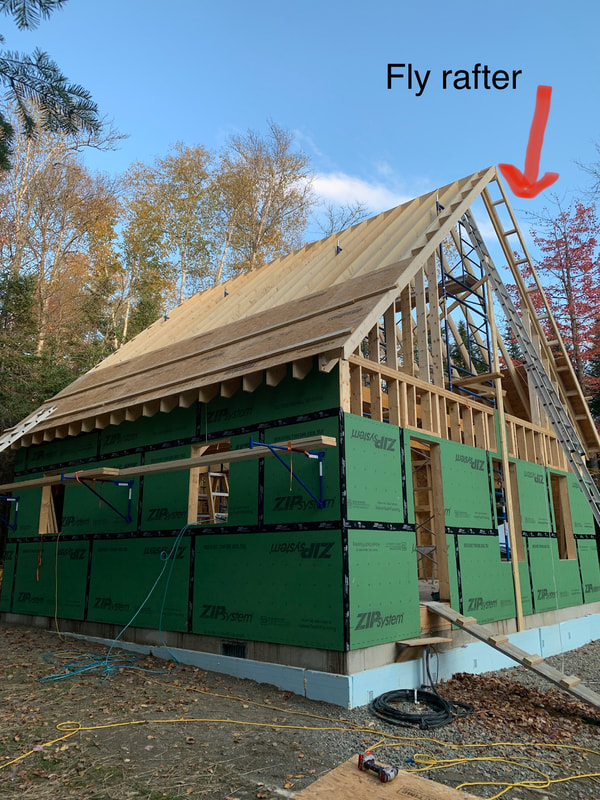 Sill plates all laid and it was only 9 am. Unfortunately, there was some mixups at the lumber place so our joists and joist hangers came in, but no LVL floor beam and no rimboards (the next step) so we had to wait until our next trip up! 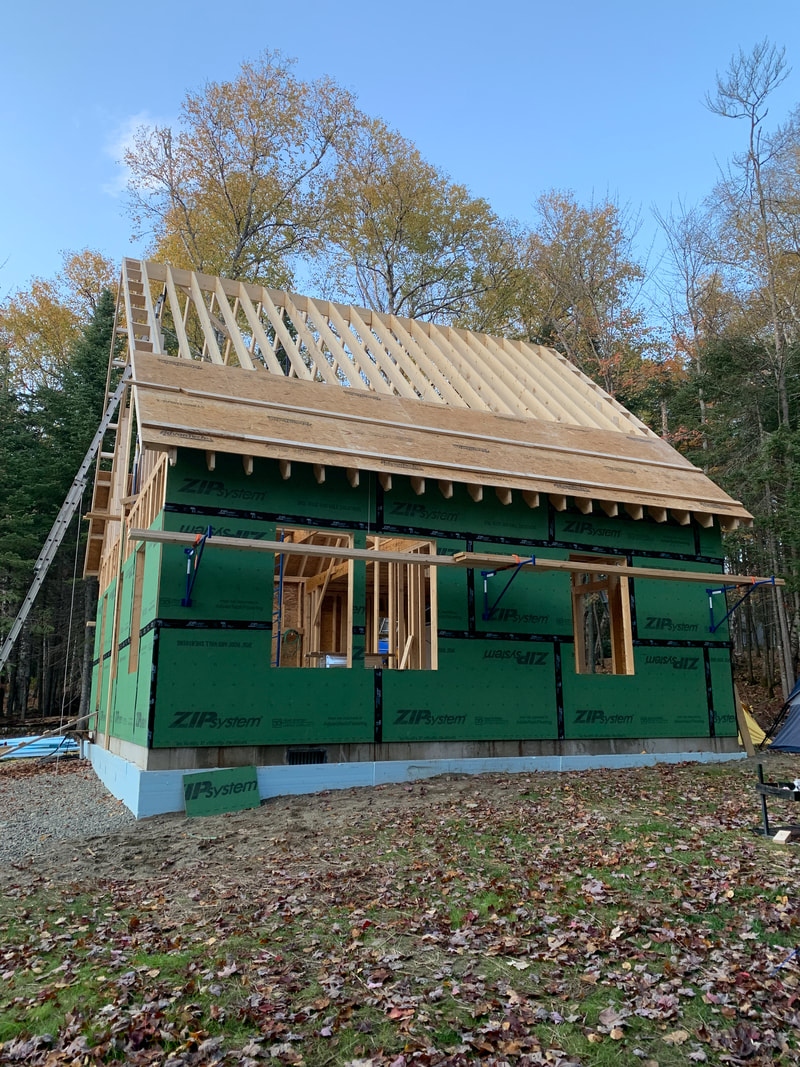 The next step is measuring out the 2x10 rim joists (or rim boards) and toe nailing them into the sill plate. I thought it was a little weird toe nailing a critical piece.. I thought we'd use L brackets or something, but John assured me that we'd be shoring this all up later as the LVL carrying beam and floor joists were laid. 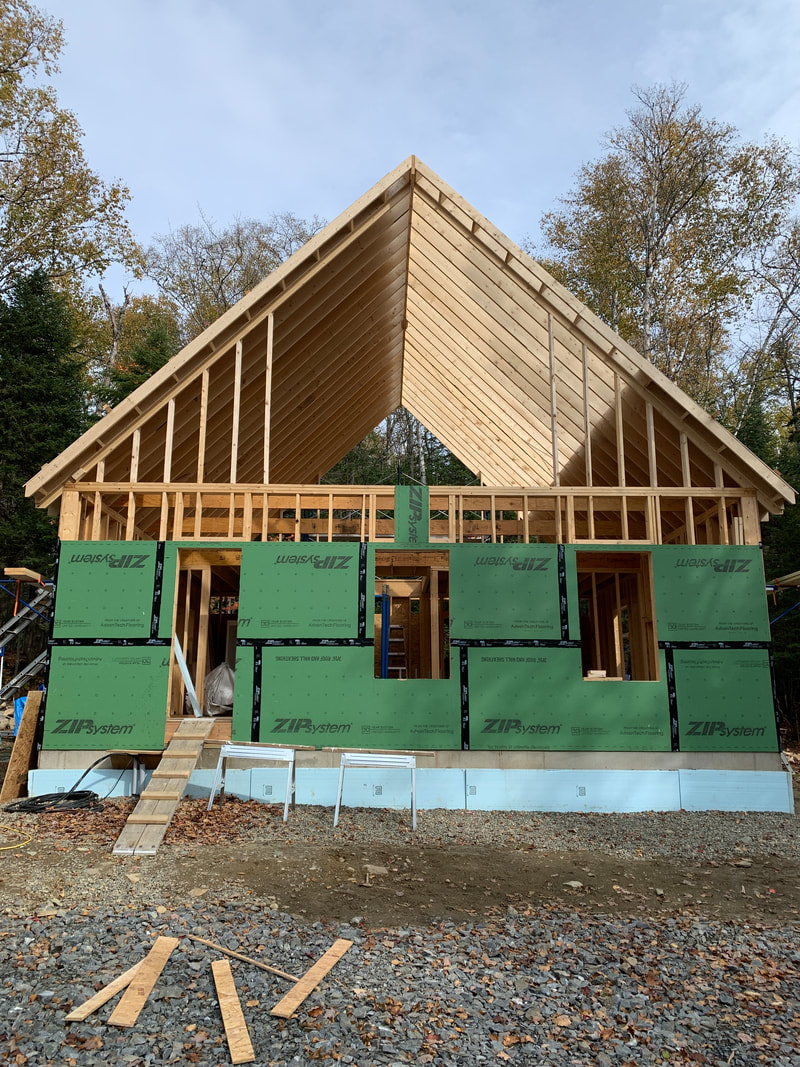 Next we laid the two 28' pieces of LVL. As you can see, there are two concrete footings for our posts. I was very surprised to find out that LVL is almost the equivalent to a steel beam in terms of strength and this puppy was dead level without any support posts below it!   We decided against using steel lalley columns and went with PT 4x4 posts instead. Later, we used L brackets and concrete screws to really strengthen the posts. The LVL is not in the center of the camp because it marks where the back wall for the loft will be, which isn't dead center in the plans. If you look closely, you can see every joist hanger marking made by John. He was very methodical in marking out every spot and reading the plans carefully. I left this work to him, but I learned a lot in the process. He's constantly teaching me new things and I'm very grateful to learn! He does the measuring and I do the nailing!  Below you'll see the joist hangers and a couple of floor joists hung. A good tip for hanging joist hangers is to mark out exactly where you'll want the joist to sit and also mark out the top of where you want the joist hanger to sit. We cut a small piece of a 2x10 joist out and used it as a measuring piece. We clamped the joist hanger to the test piece of wood which made it a lot easier to hang the joist correctly. Trying to squeeze them together and screwing them in seemed impossible without doing this. I wish I had a picture of the clamped piece of wood... man did this go much faster with one guy holding the joist hanger and the other guy on the drill! 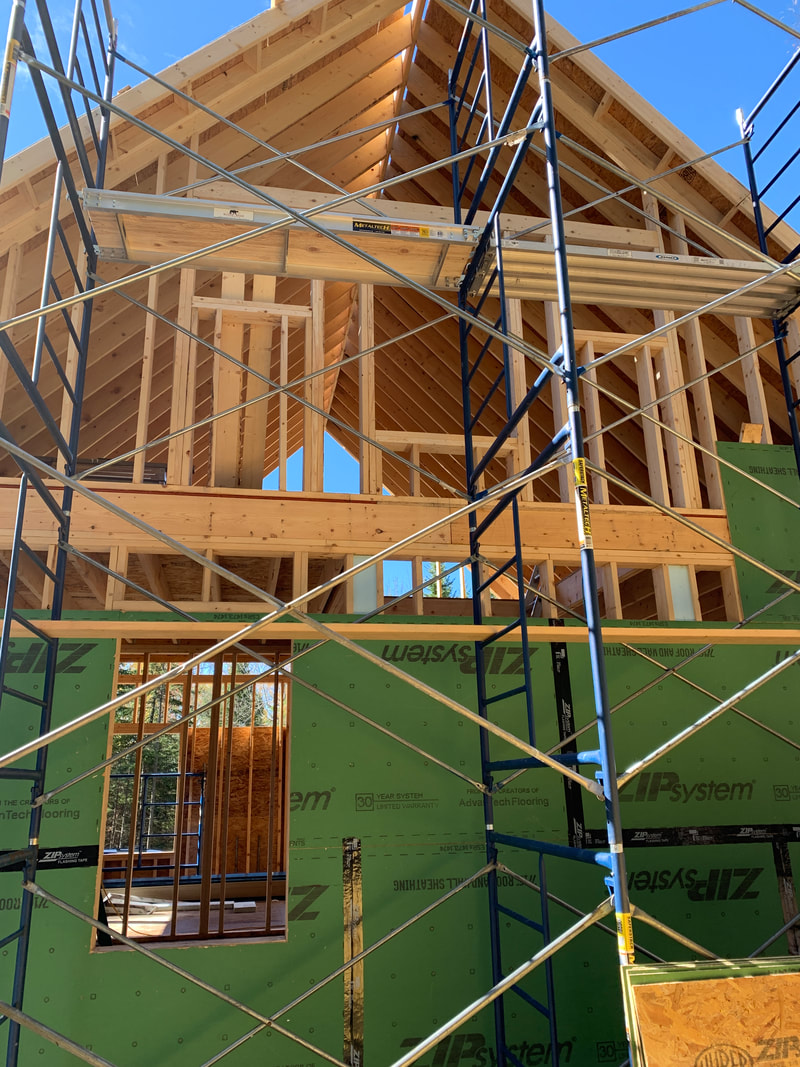 8 screws and 4 nails in each joist hanger times 50 joist hangers was a lot of hammering. I don't know if it was safe or not, but I used the nail gun to put in the nails on the left side. I couldn't get the same leverage on the right side, so I had to hand nail those in. Nailing into that LVL is tough stuff! 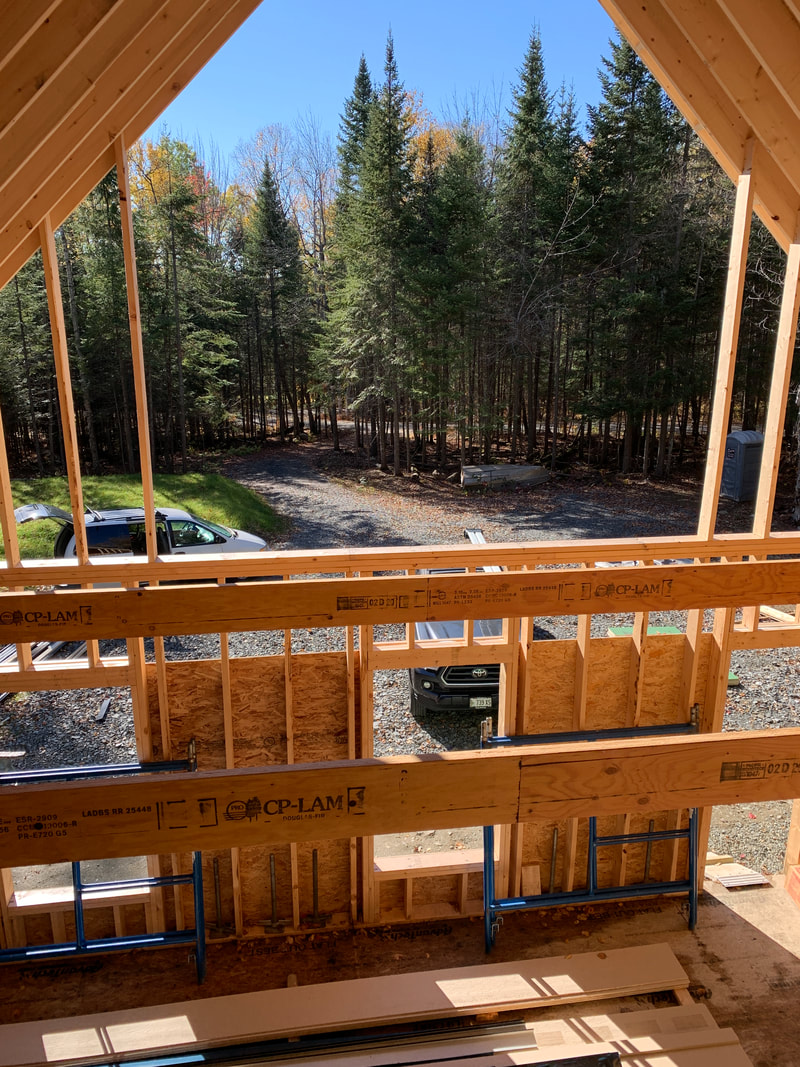 The joists are all hung and the door for the crawl space is framed out. We'll make a ladder using 2x4s for this access which will be in the bedroom. There will be a latch that is flush with the floor that will be under a rug, so you won't even know that it's there! 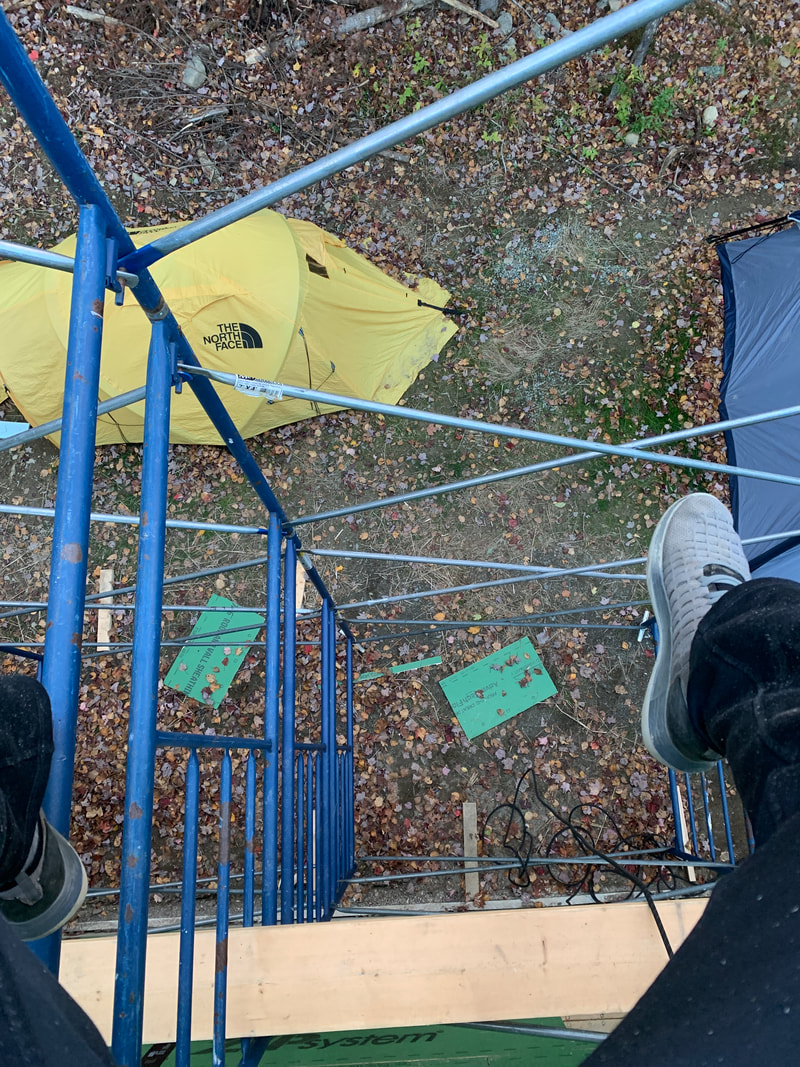  Down goes the advantech sub flooring. We had to use adhesive caulking for the floor then nail them all down. Very cool to see that each piece of subflooring had marks for the joists, making it much easier to know where you're nailing. This part FLEW with 3 guys. 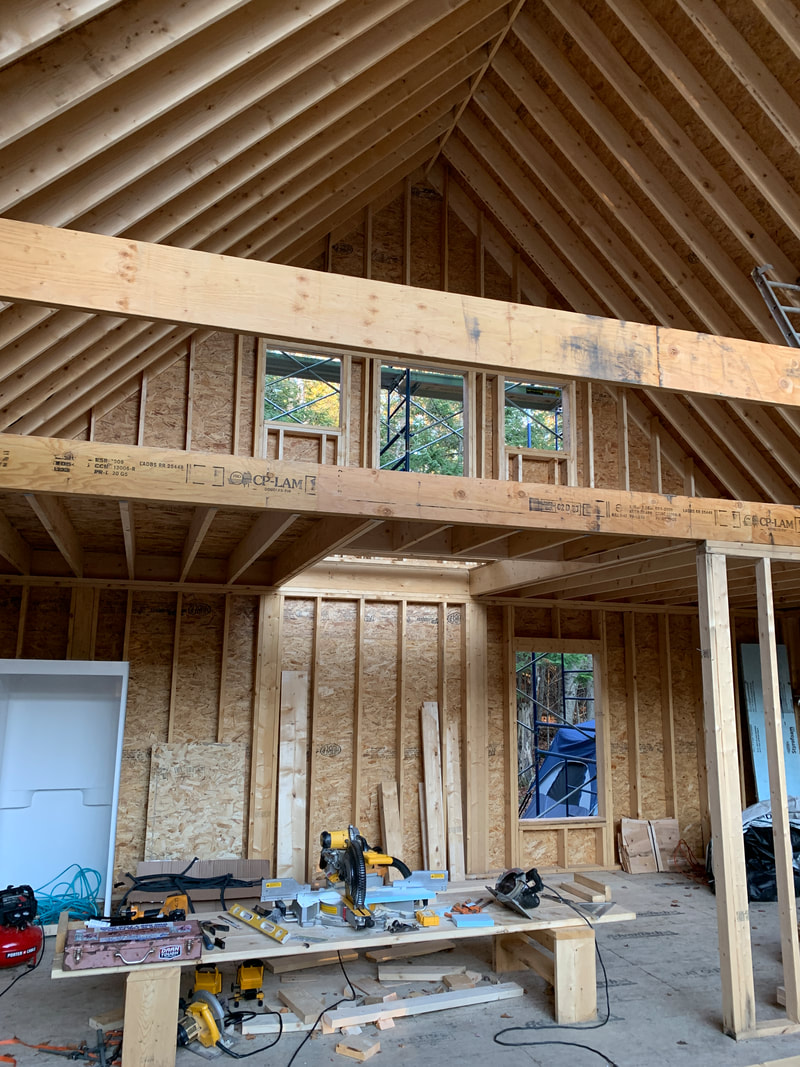 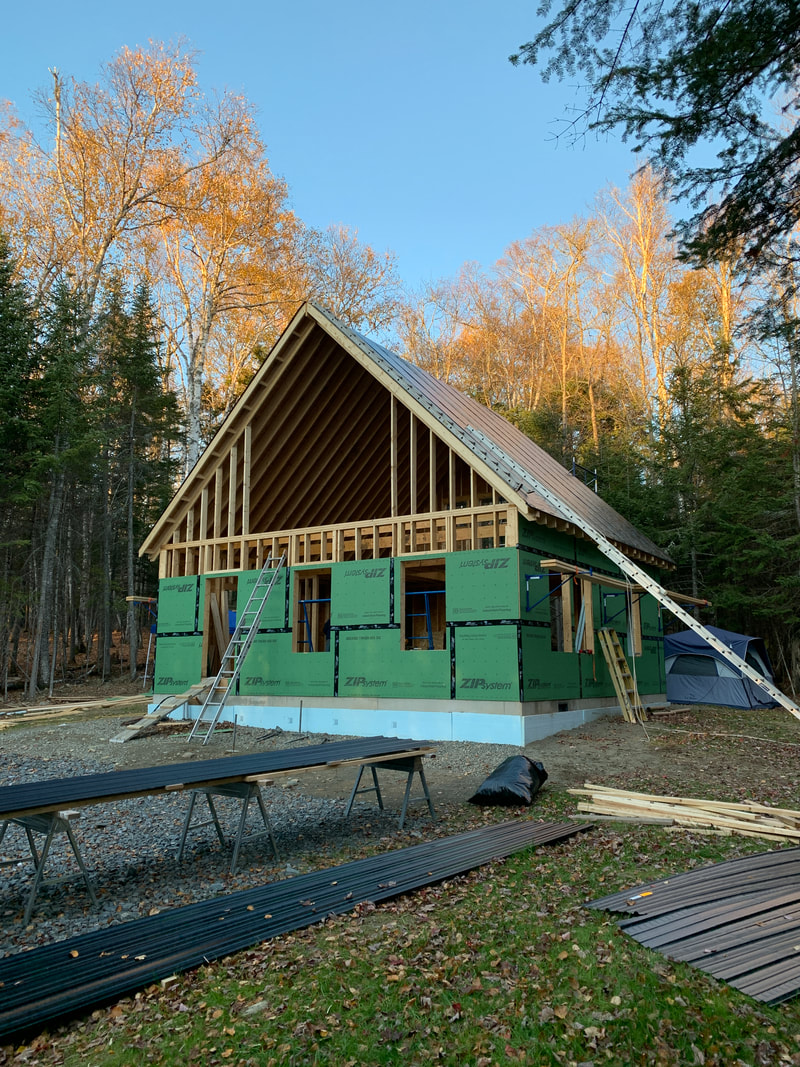 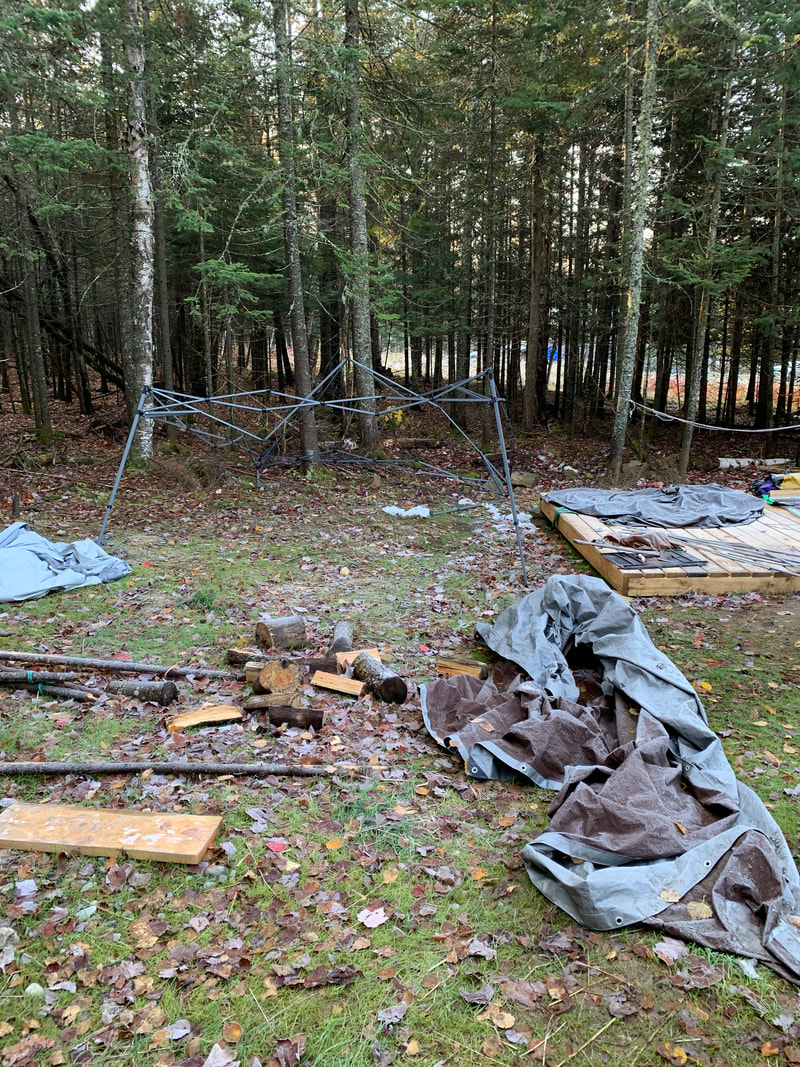 You start to get a feel for the place when the floor is laid. Below you'll see me emulating where I like to spend my time :0)  John's thoughts about all of the little things, like insulating this space that will be covered up by subflooring makes me appreciate the time that he takes to think things through! 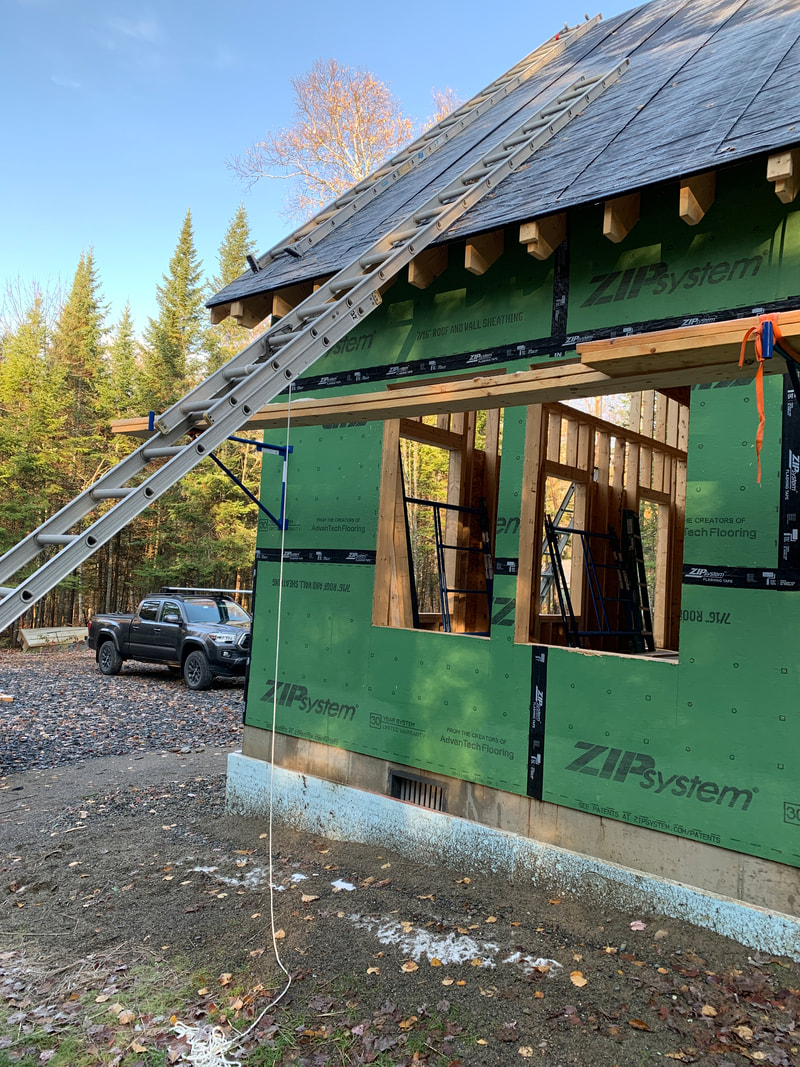 Below you'll see the door that I notched out, created and hung. Note to self, I'm a horrible chiseler. I notched out all of the spots for the rungs on a miter saw, but I noticed that flipping the piece around and going all the way to bottom of the notch made it much smoother when I had to chisel out the rest of the notch. Let's just say I'm glad these rung notches are hidden and nobody will ever see them! 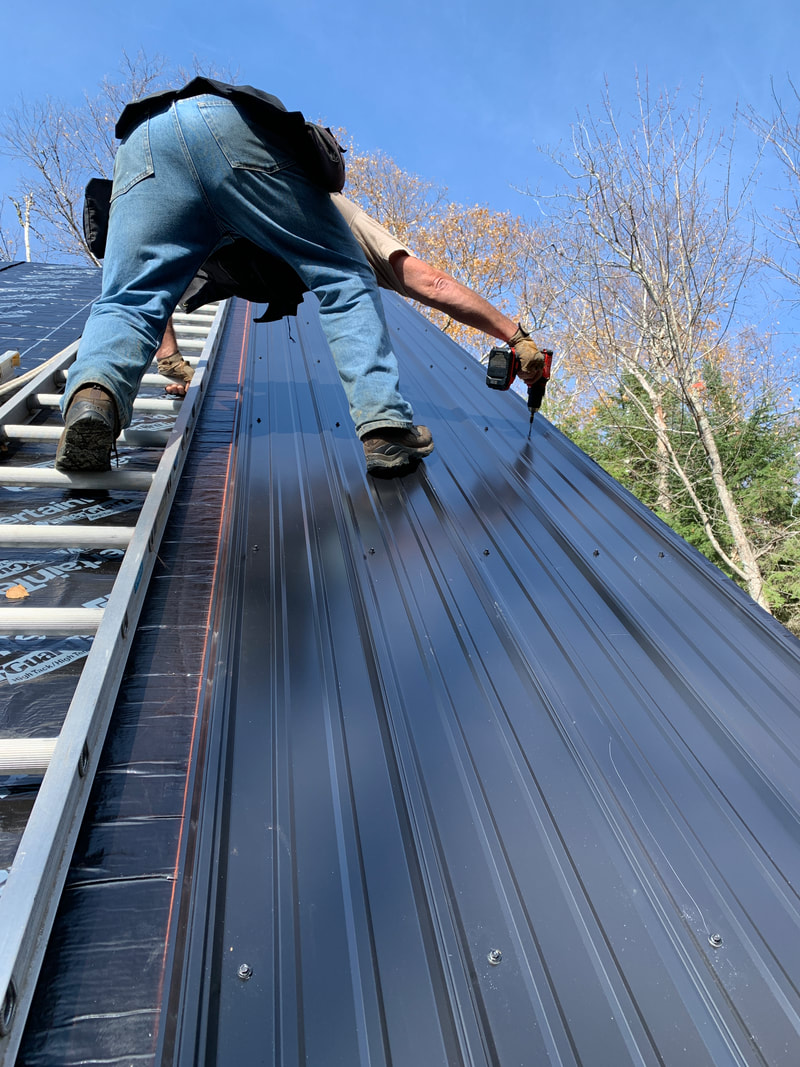 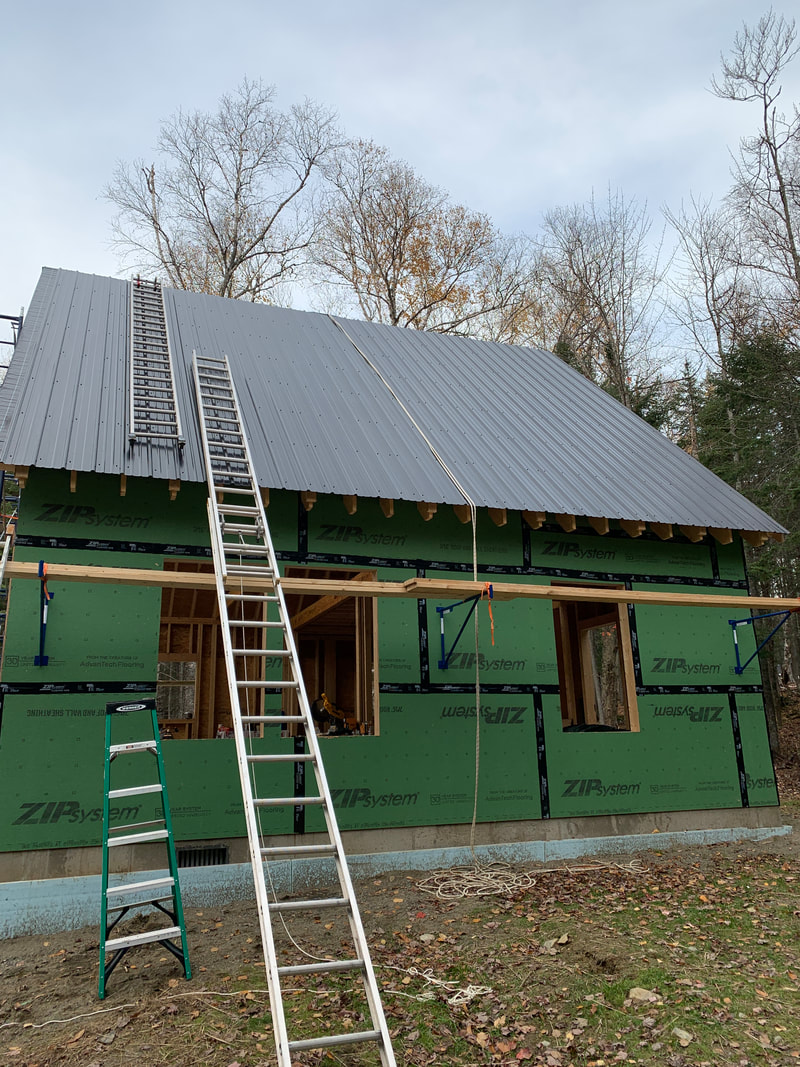 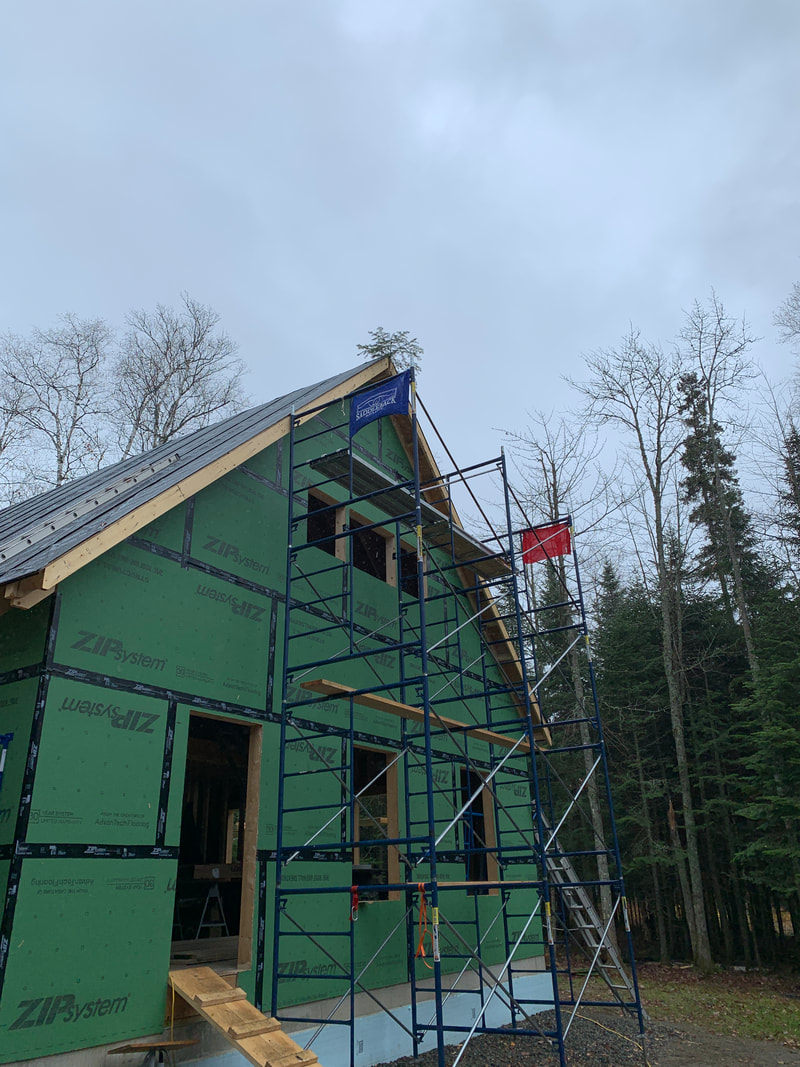 Time for the walls! John methodically marked out all of the wall studs, windows and doors on the sill plates, which made it much easier for nailing and constructing the walls. Below you'll see that we started with the corner then worked our way across. It was very easy once we got going. John gives me a lot of cutting to do while he's mapping things out. It's a good feeling to not just sit around and watch. I like being busy! While I'm nailing he's on to mapping out the next thing.  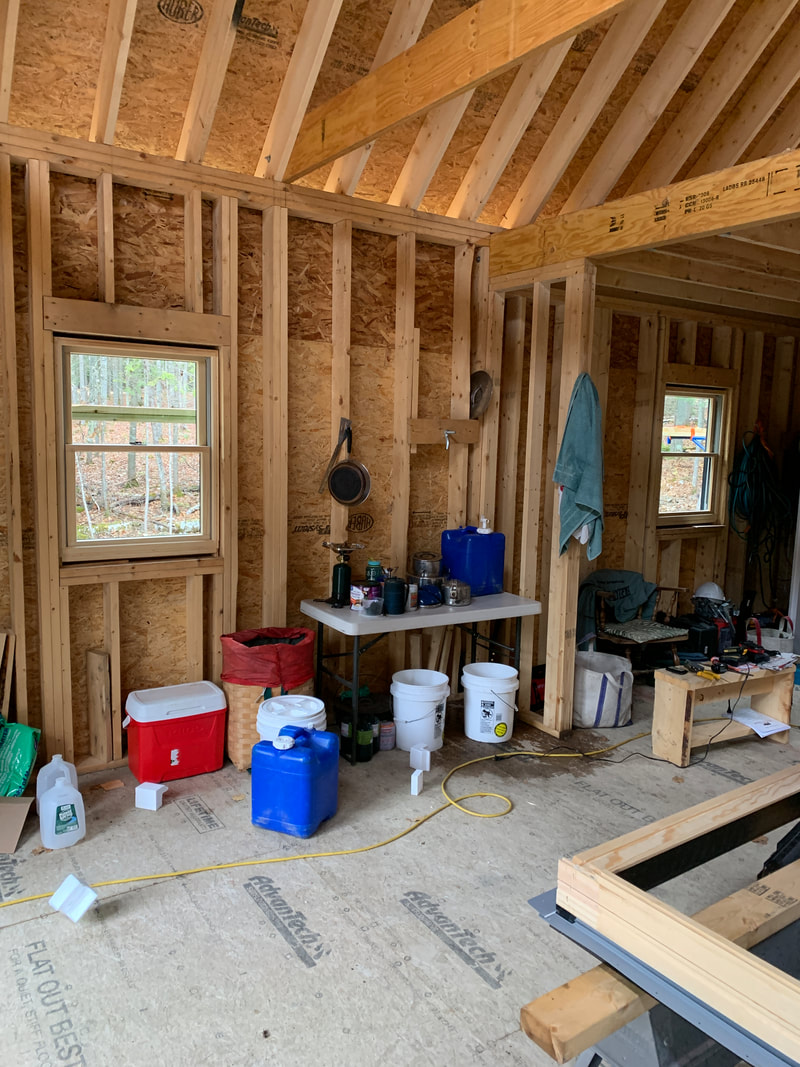 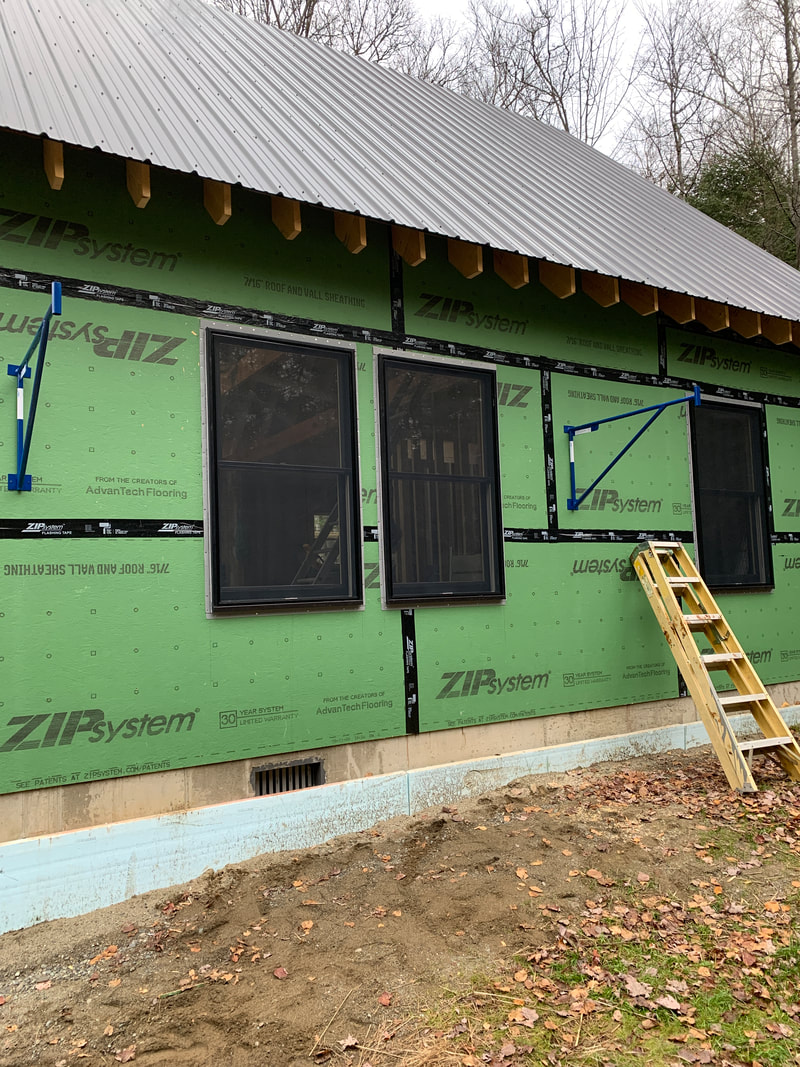 So I've never raised a wall before. It was in 2 pieces, so it wasn't too heavy, but we temporarily nailed in these pieces on the edge so that when we stood up the walls it wouldn't slide off the edge! 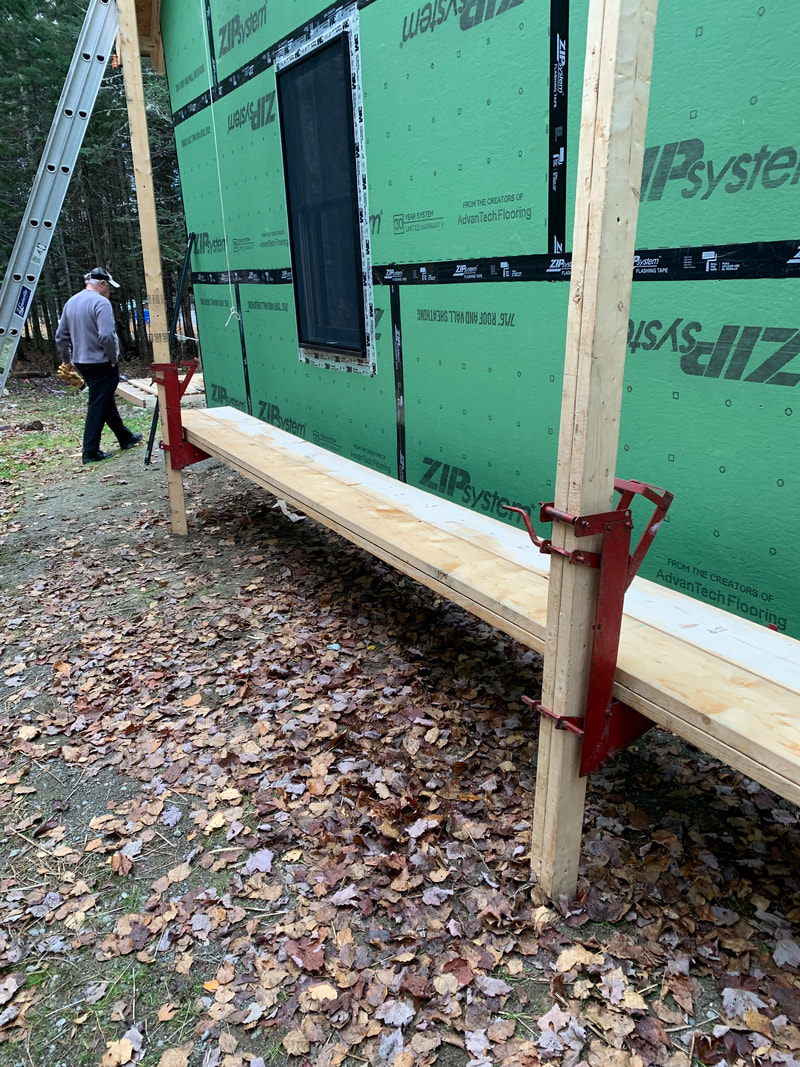 The front wall is up! All plumb and braced!  Below is a partition that we built for the back wall. If I remember correctly, this is basically a beefier stud that illustrates the ending of a wall that will be added in front of it. For instance, on the left of this will be the shower and to the right will be a closet that goes to the stairs, where another partition sits. It's important that we insulate the inside of the partition before putting on the sheathing! 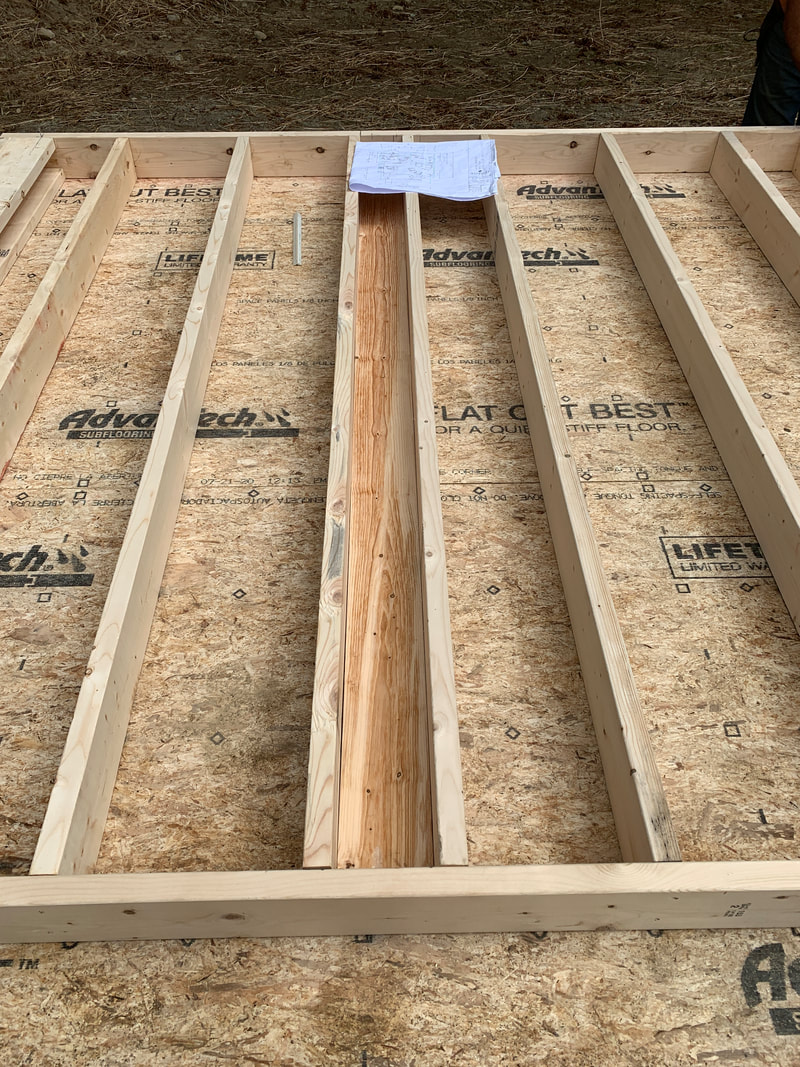 Front and back walls are up! Now on to the sides! 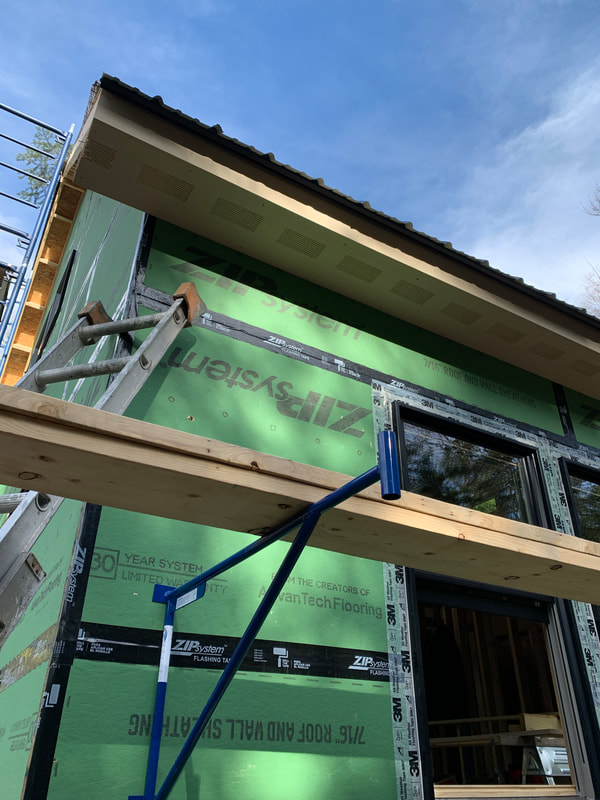 I had to leave after the front and back walls were up, but it was a ton of fun spending 3 days putting on the floor and those two walls. Camping out at night under the stars after drinking whiskey around the campfire was just what the doctor ordered during these crazy times. I'll remember this experience for the rest of my life, and I plan on making many memories in this cabin! John is finishing up the side walls and I'll head back in a couple of days to help him raise them. Then it's on to sheathing!
Unfortunately, the footings for the foundation were poured in late June and the frost wall did not go in until August 7. Sore subject, so we won't go there! However, as you can see below the foundation has been poured. You'll see holes in both sides for screens/windows to promote airflow underneath the camp. We'll have two posts underneath a carrying beam, which will inevitably hold up the loft. We decided not to spread tar on the outside of the foundation for waterproofing because it will just be crushed rock as a basement floor. There will be a "trap door" about 30" x 30" in the bedroom to gain access into the crawlspace if needed. All of the systems will be above the floor so there shouldn't be much need to get down there. Not pictured are just 2'x2' footings that were poured for the two valley columns that will hold up the carrying beam (two pieces of 28' LVL). As a reminder, the camp dimensions are 28' wide and 25'6" from front to back. There will be a 6'6" screened in porch on the front of the camp. The end dimensions are basically 28'x32'. 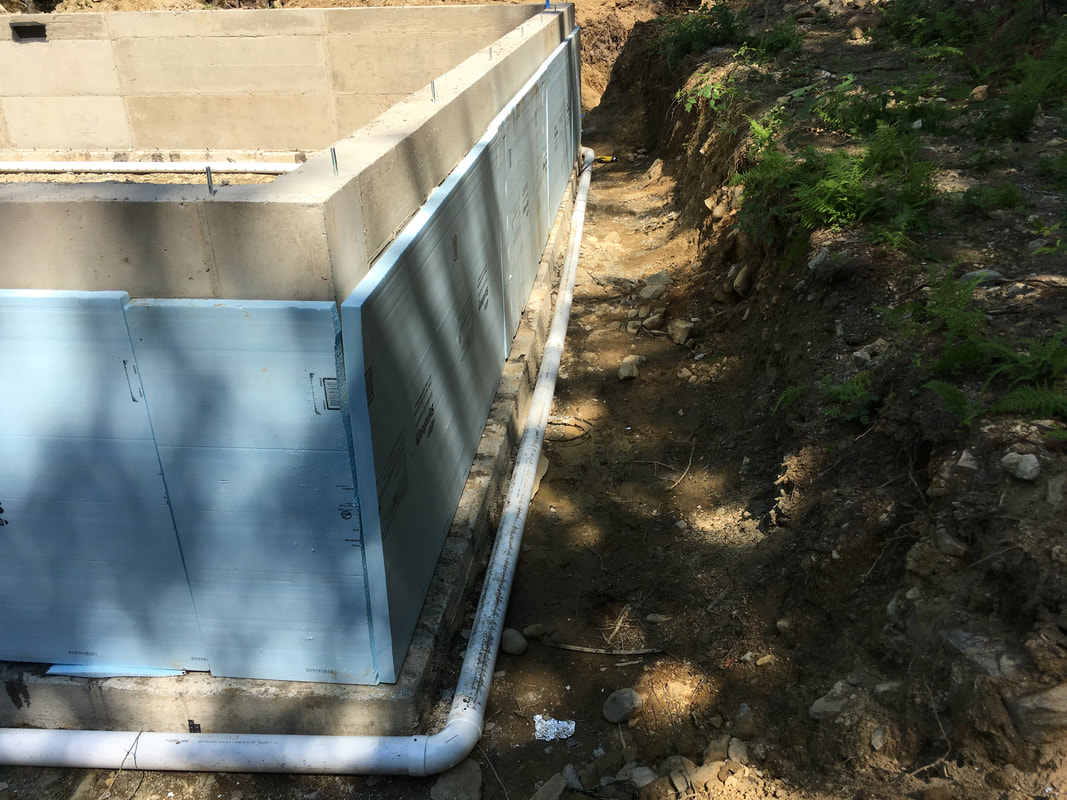 Here's a shot of the well line. We're putting in a curb stop, which is essentially an outdoor valve that you can turn on and off to drain water back down into the well so there's no water in your well line. I will likely utilize this option in the winter to drain out all of the water just in case power goes out. The plan is to keep the heat around 50 degrees through the propane monitor heater, but drain all of my sinks, put antifreeze in the toilet and drain the well line every time I leave. Until a generator is installed I'm going to play the game of drain the water because frozen pipes are a nightmare! 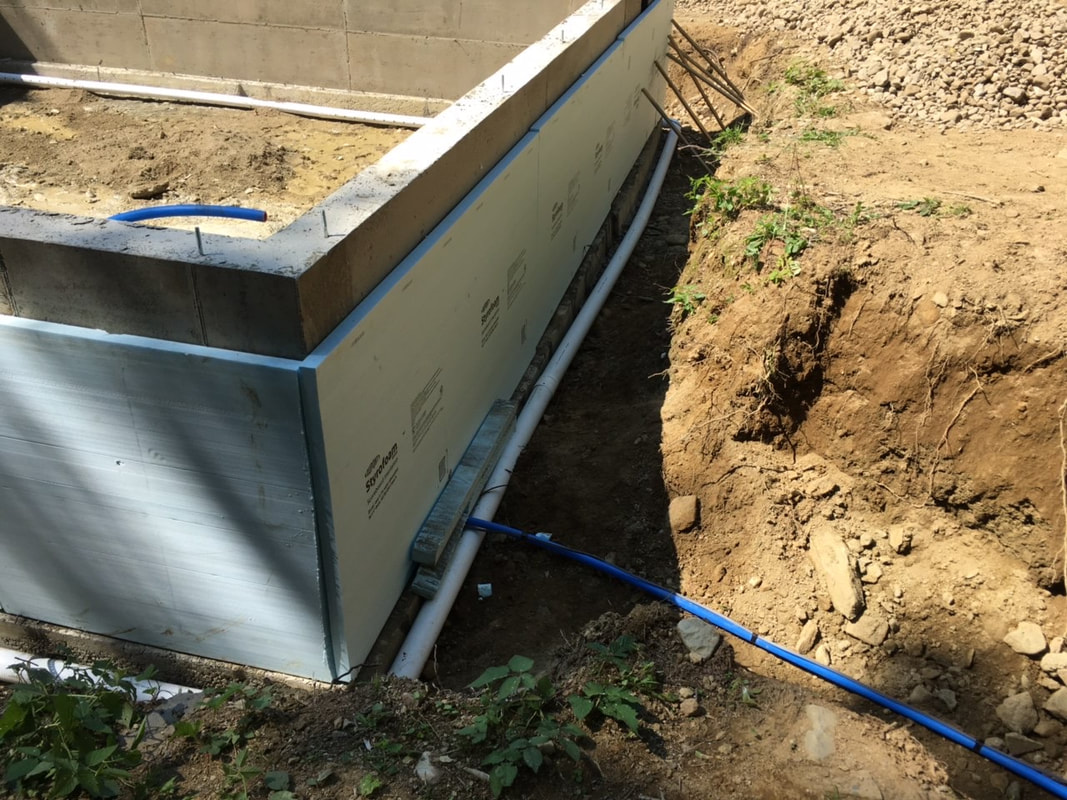 Here's a better shot of the foundation in with the septic system also installed. We used the 2" foam board on the outside to create extra insulation. Pretty soon this will all be backfilled with loam and seeded with grass. The electric line is dug, but it will take CMP about 2 weeks to come hook it up at the pole so we'll be working through the floor build and some of the wall framing with a generator. Next pictures should have some wood in them!! 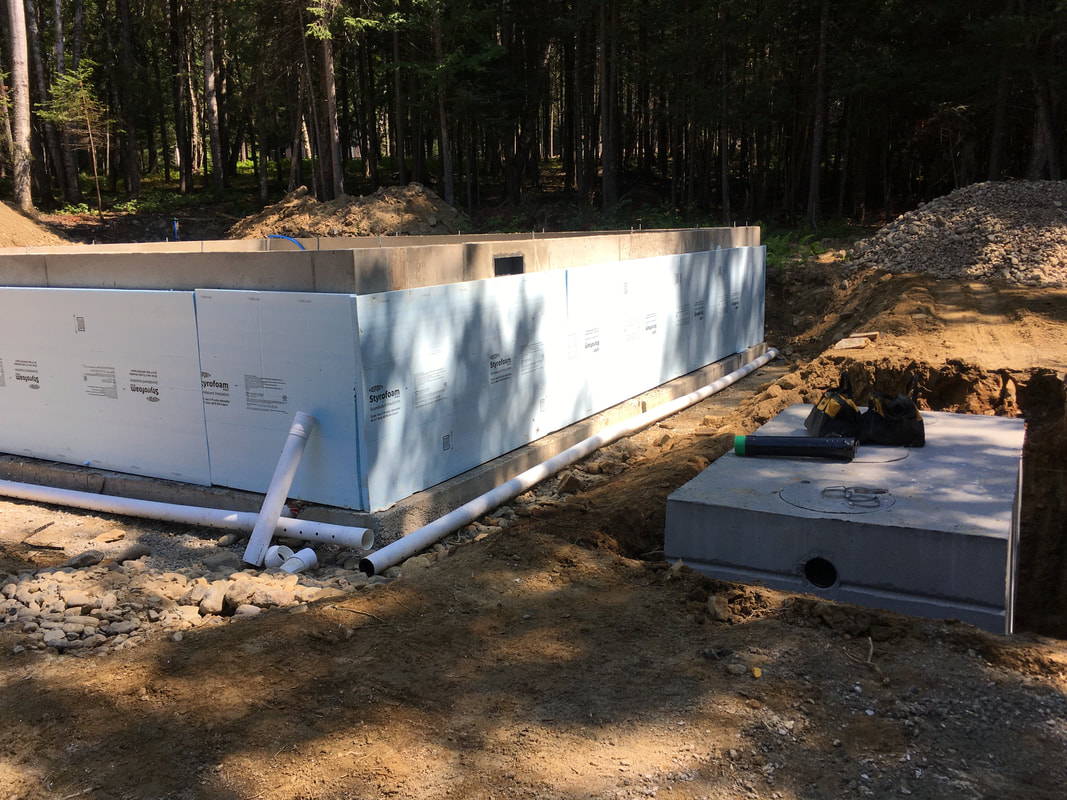 |
AuthorAaron Broaddus is a passionate fly fisherman and a Maine guide. Archives
February 2023
Categories |
 RSS Feed
Headin' North just always feels right