
|
Working with two guys means that things take time. We've been making great use of our time, but we've had a couple of hiccups which haven't wasted any money, but they've wasted some time. My biggest regret and thing that I missed was framing out a 30" door instead of 36". It's easier to fit bigger stuff through a bigger door, but we're moving in things through our 36" windows before we put the windows in. Other than that, we had some rafter issues, but all has gone well. Since my last post, we've made some great progress, and sleeping has been great with dry nights, no bugs and cool temps! The sheathing is on most of the camp at this point. We left out the top part because we'll use more sheets to tie into the gable ends on each side. 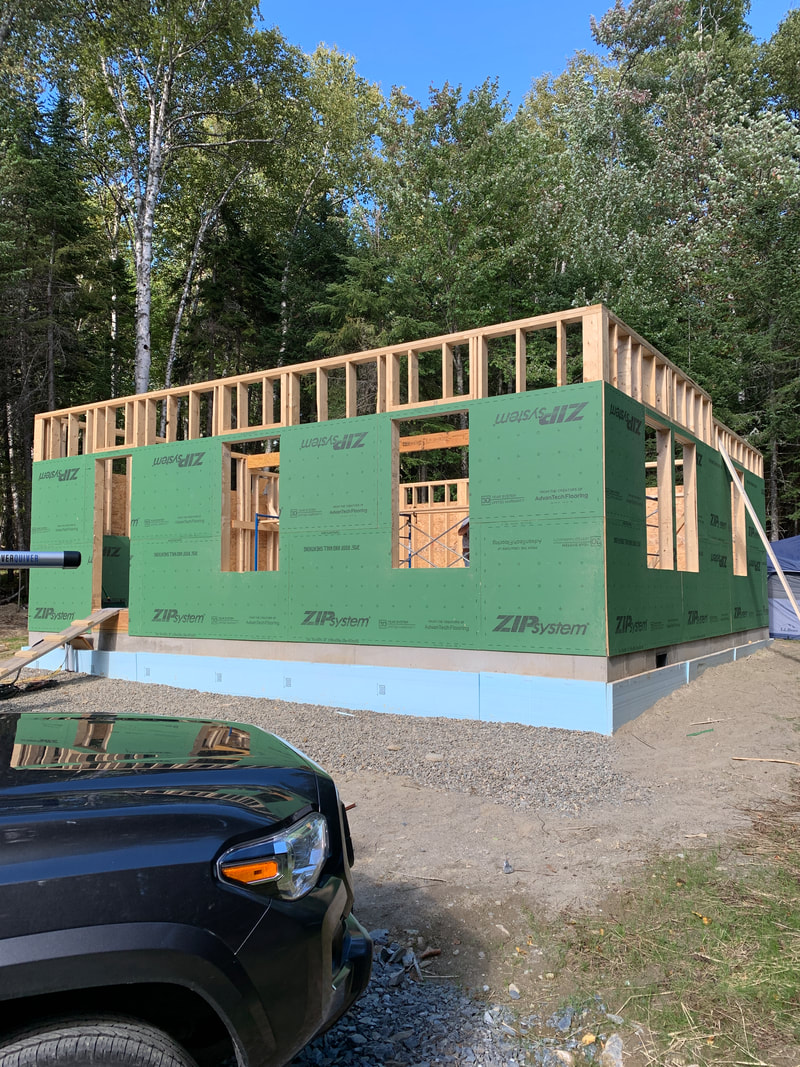 We framed up the second floor next by tying the floor joists into the LVL in the middle, which was doubled up. We'll have two support walls under this. In the pics below, you can see the joist hangers, then the stairwell in the middle framed up, then some floor sheathing put on and finally the second floor was finished. This goes pretty quick when you have mapped out all of your joists ahead of time. I've quickly learned that a straight line with an X next to it means that's where you put the joist! 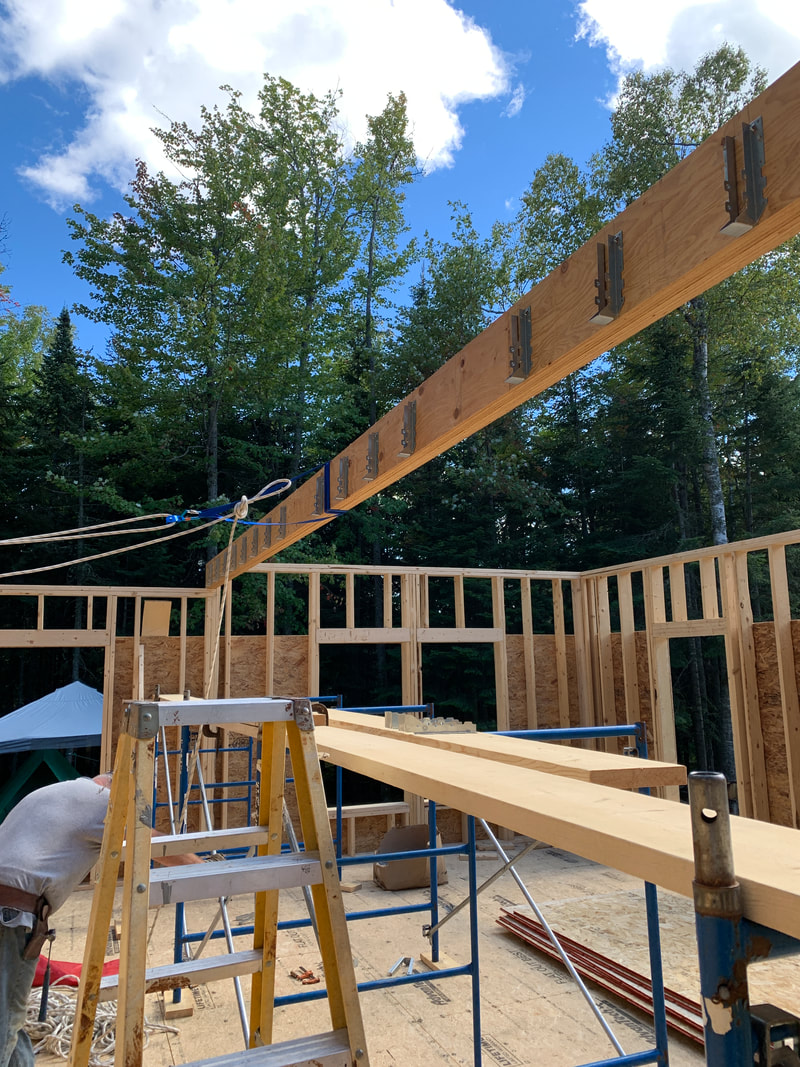 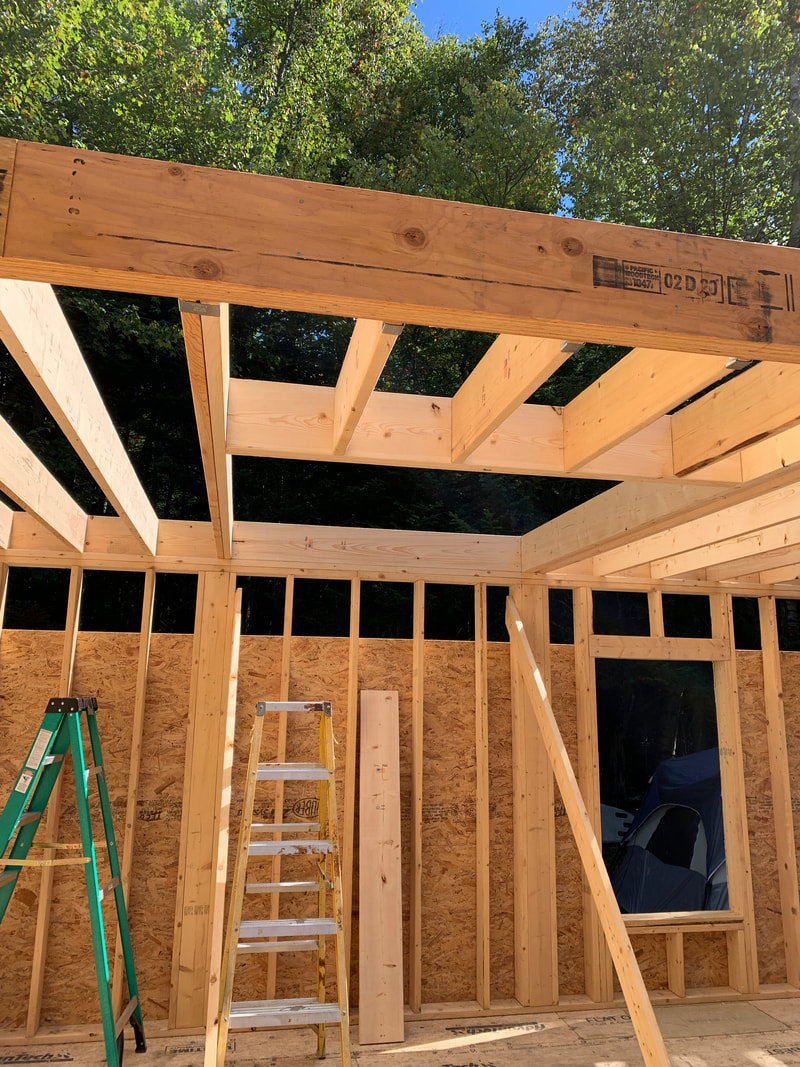 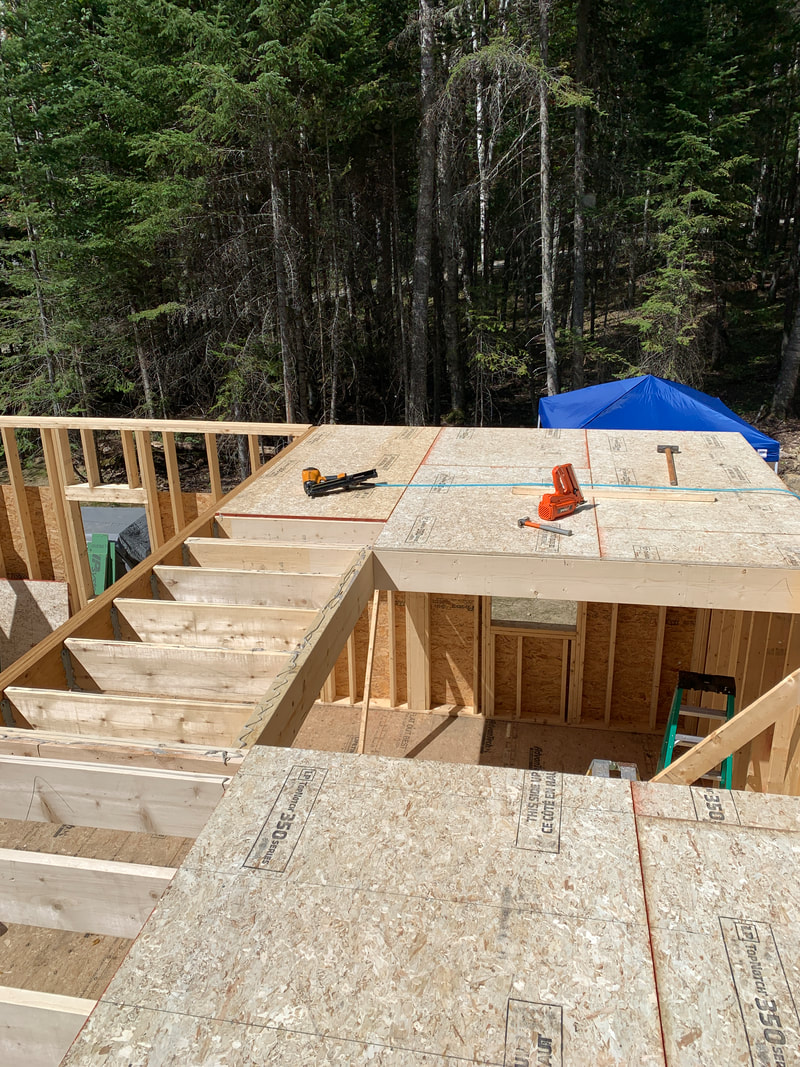 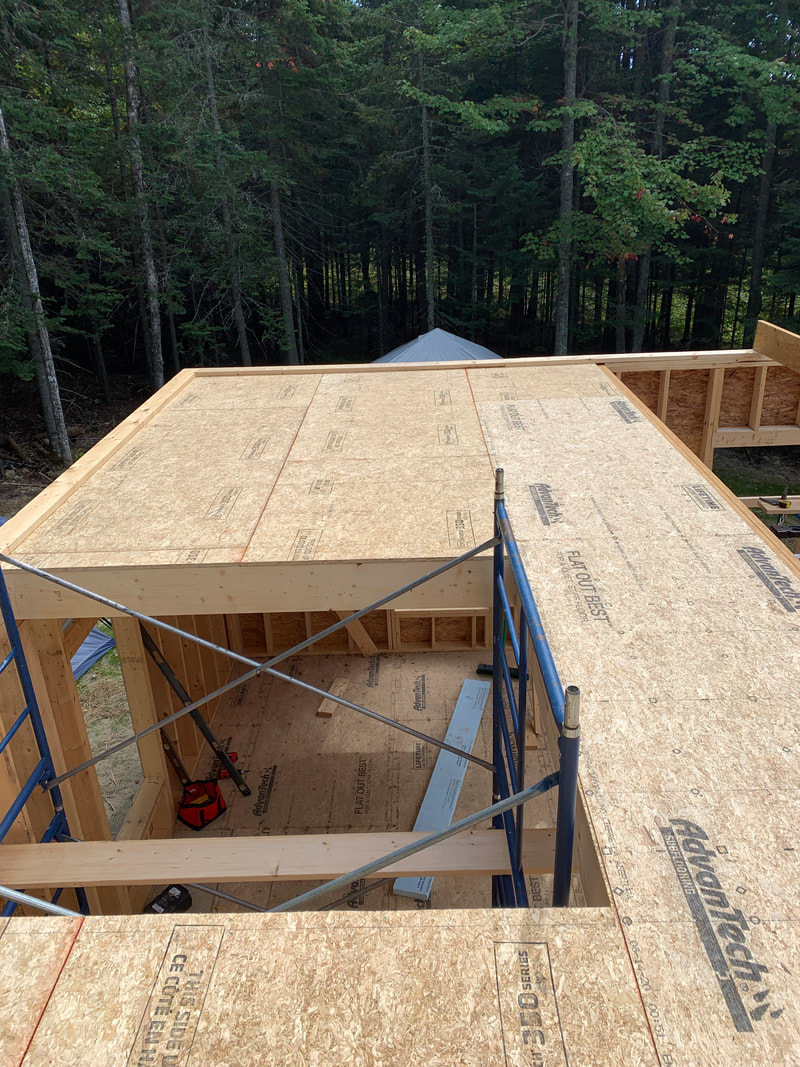 Our floor sheathing was hanging over just a little bit so a T-square was a great tool to use to make a straight line for a circular saw cut. The second picture is the top plate that you put on to match the top plate on the front half of the camp. 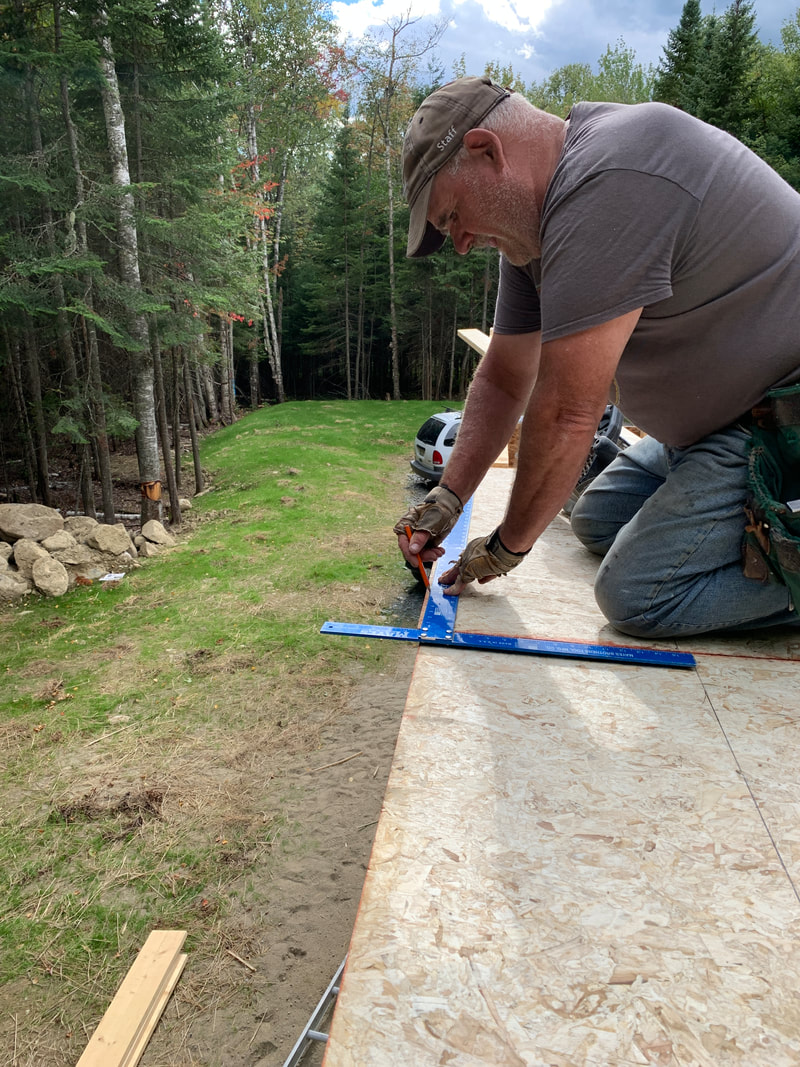 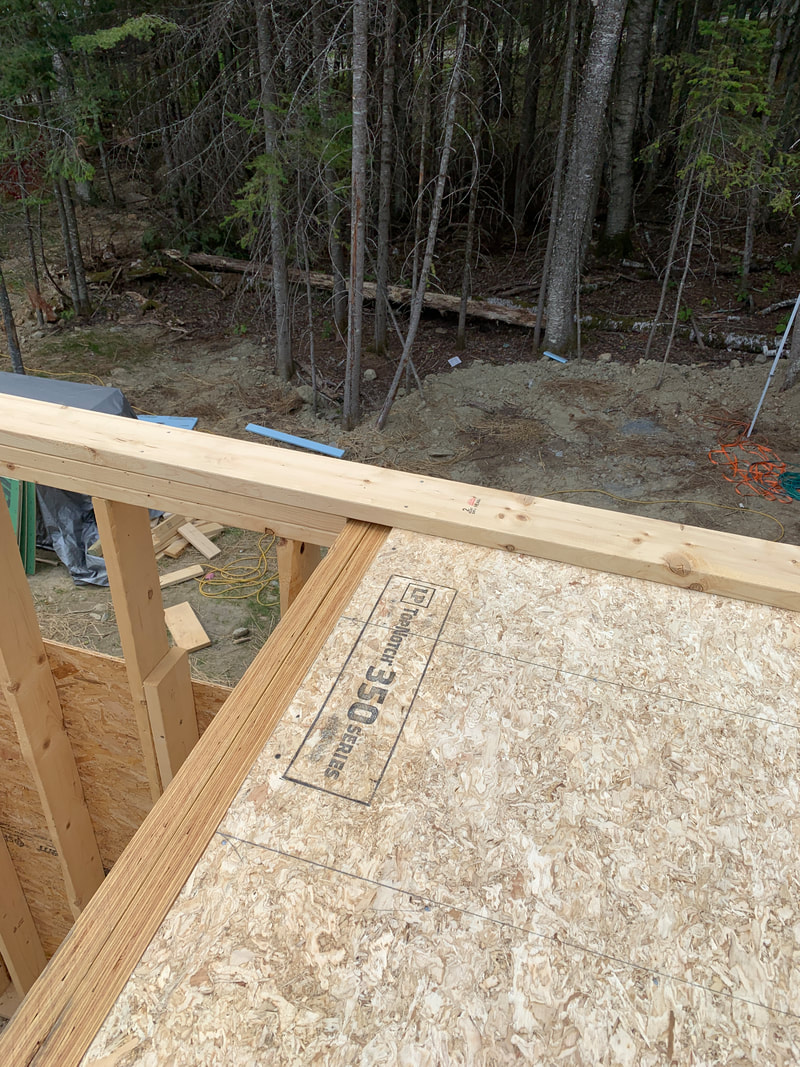 Next we built part of a support wall, which is also the front wall of the bedroom. This made the second floor bounce a lot less! On the opposite side not pictured is a 30" bump out for the pantry, which is also a support wall. The doubled up LVL is 28 feet long and didn't sag at all even before all of this support! That stuff is so strong! 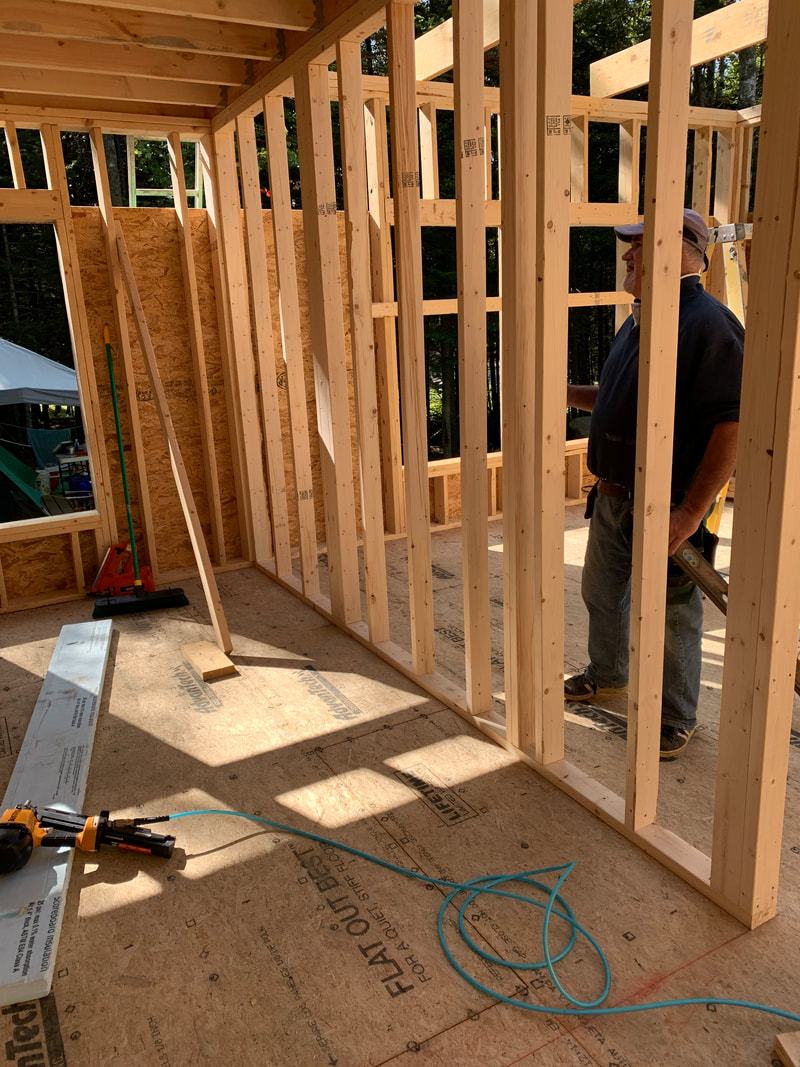 Before we got started on the roof, we had some small things to take care of. My dad came up for a day and we put him to work! He taped up the seams in the sheathing. Then him and I cut what seemed like 100 sheets of 2" foam board as insulation for underneath the floor. That stuff is nasty to rip on the table saw... it's sticky and particles end up in your eyes, ears and mouth. Our masks came in handy for this step! 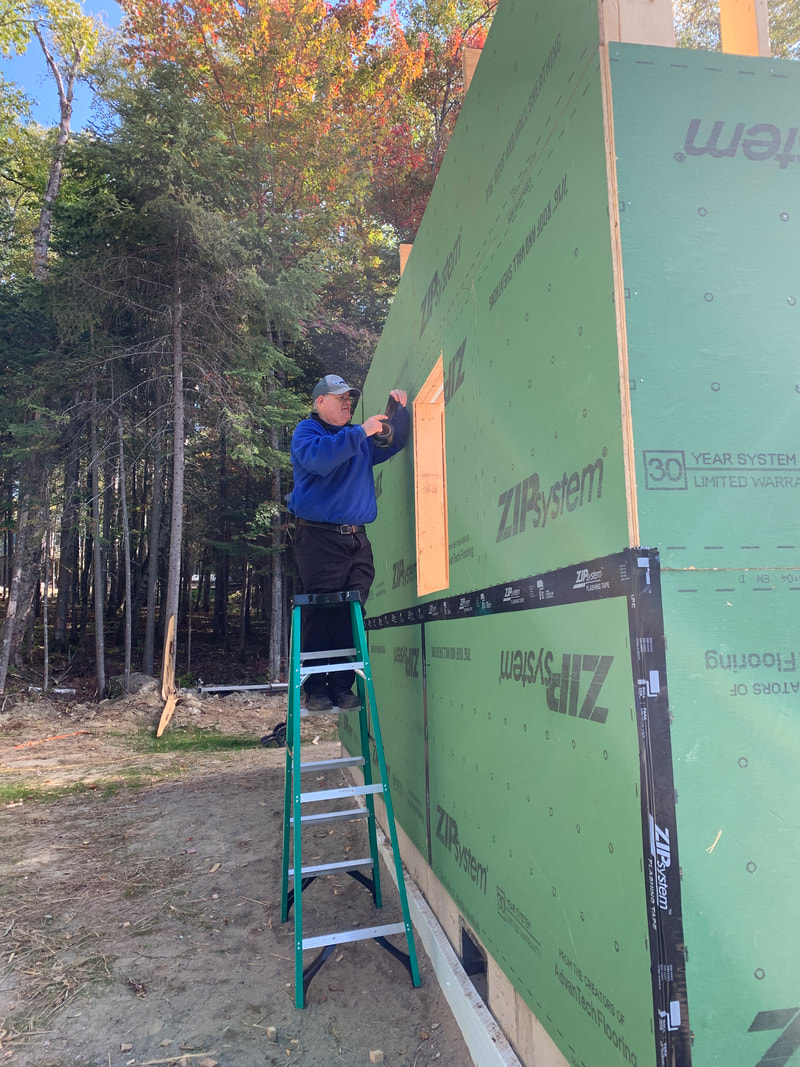 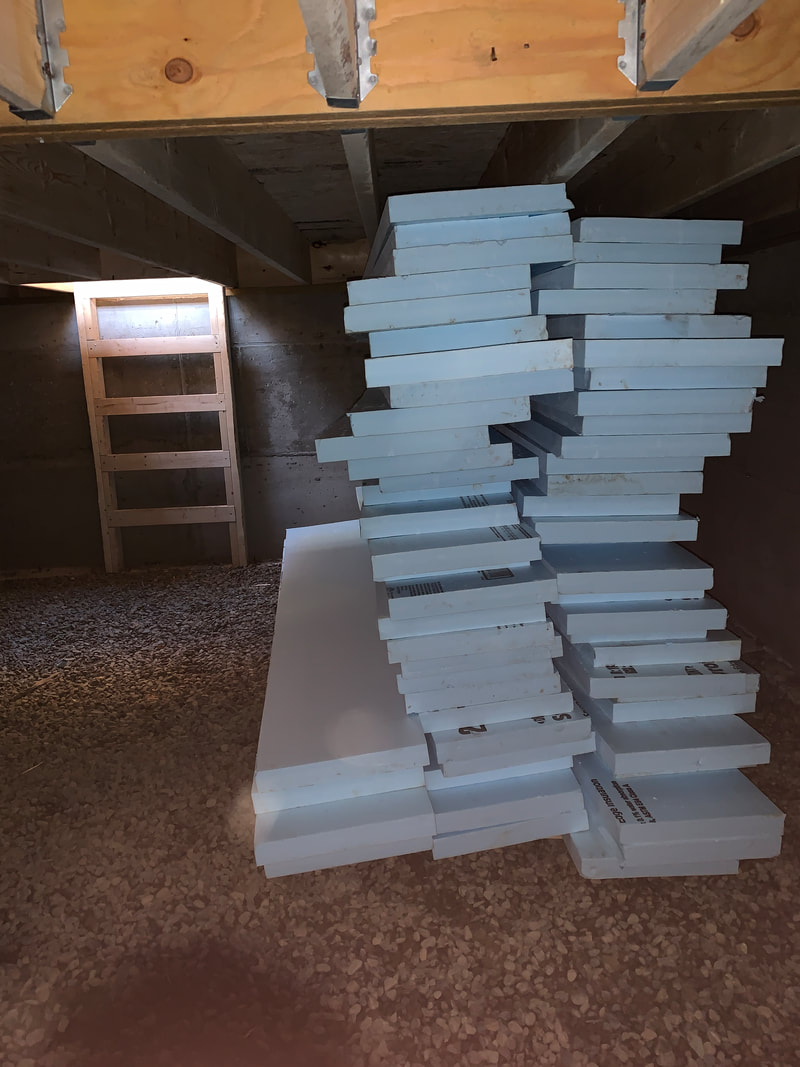 Now on to the roof..... we had to get the ridge beam up first. We had to build posts on each end with 2x6's and as you can see we're starting to use a lot of staging. We also put a post in the middle attached to the LVL. This is a tricky process because we needed to know the exact length of the rafters. We had some issues with the rafters that were sent, they were too short. So after some back and forth, we got the right sized rafters sent and then we were able to get the ridge beam up. 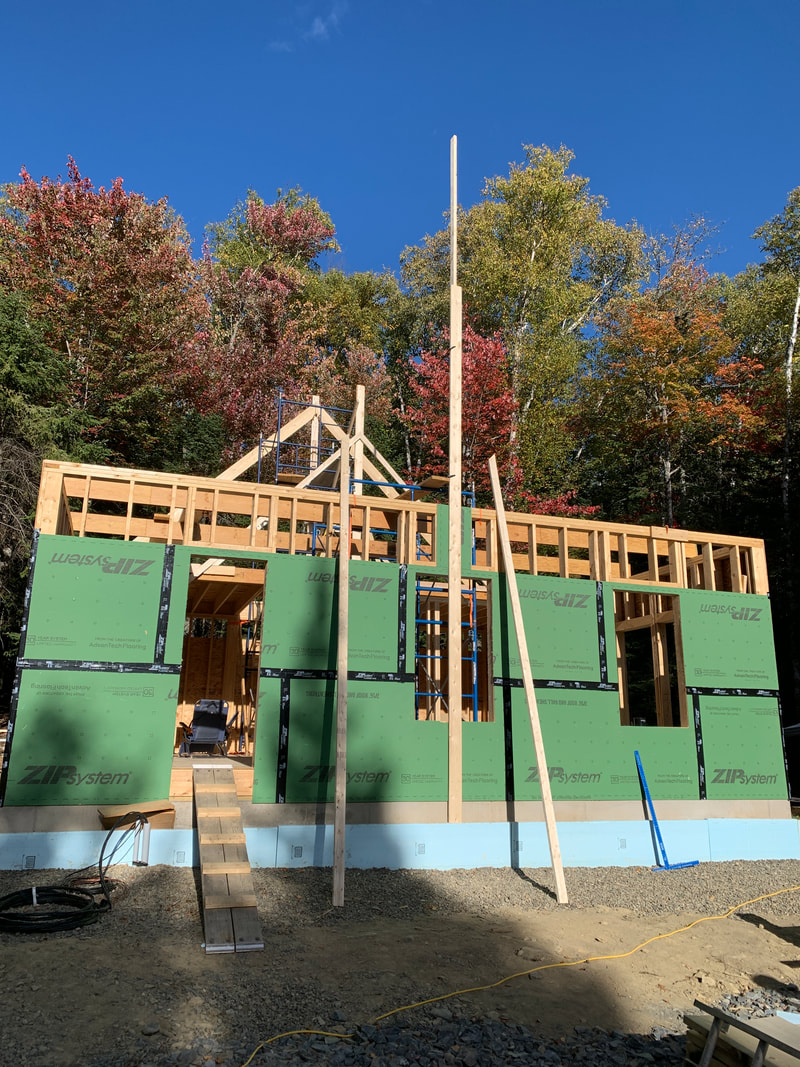 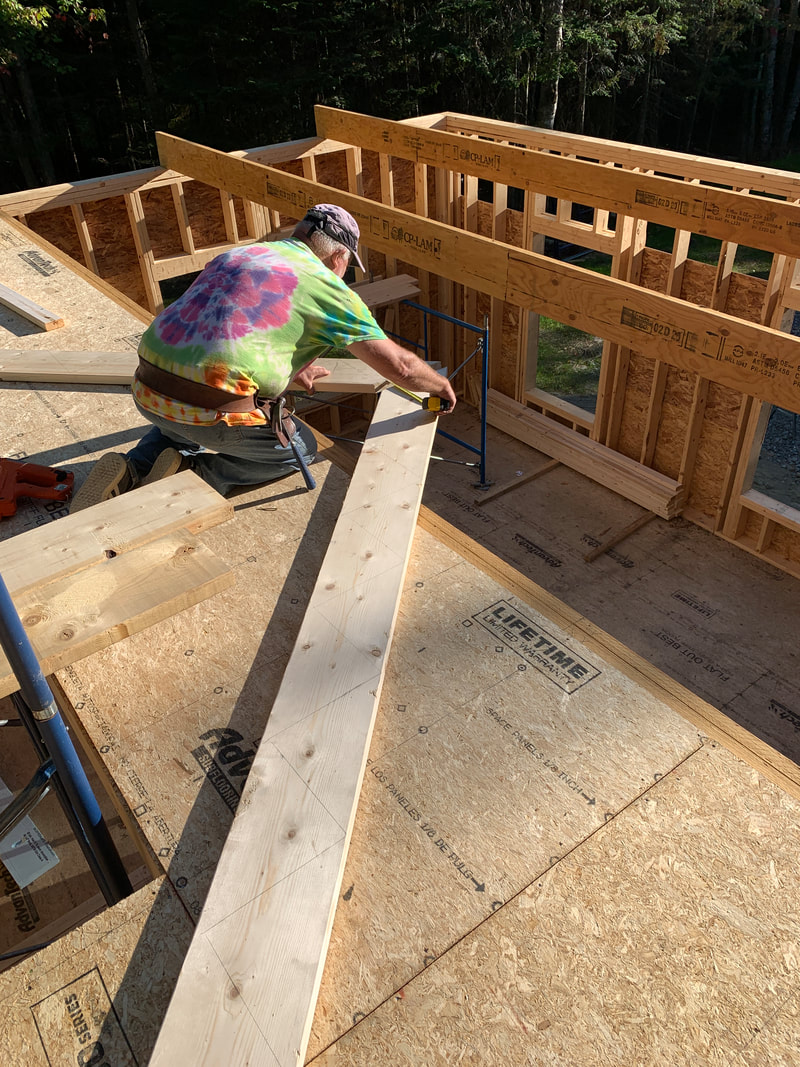 We measured and measured. Finally we determined the boards were too short! 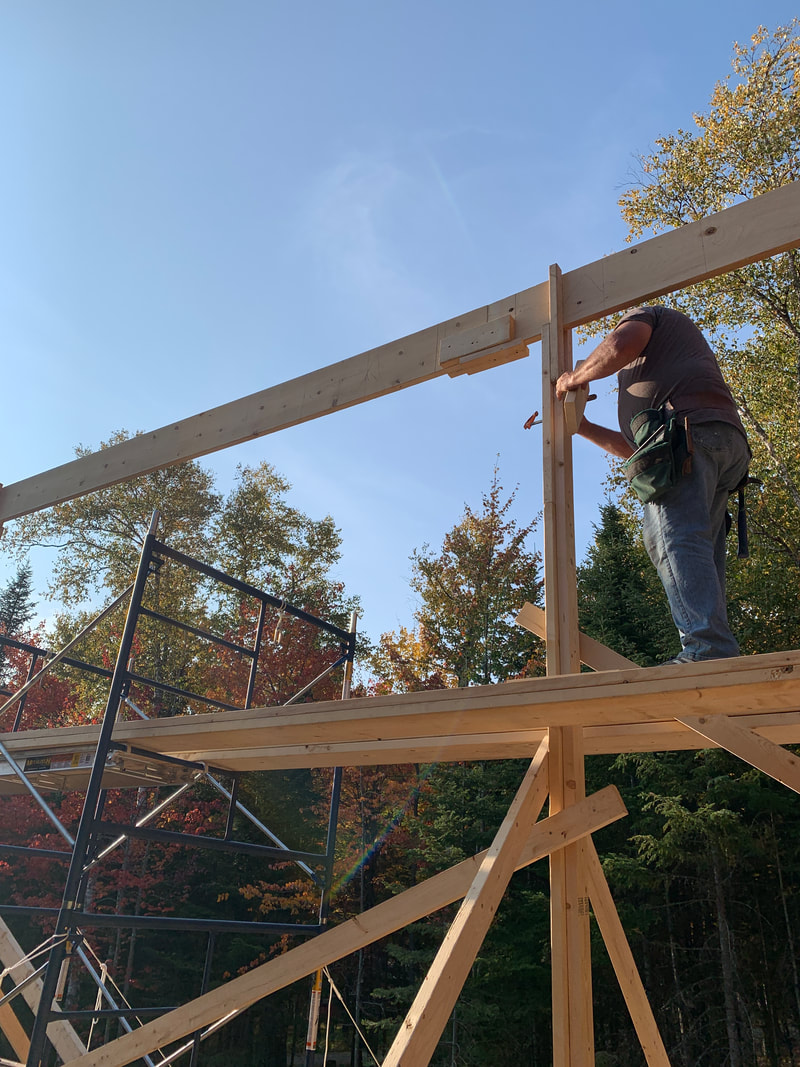 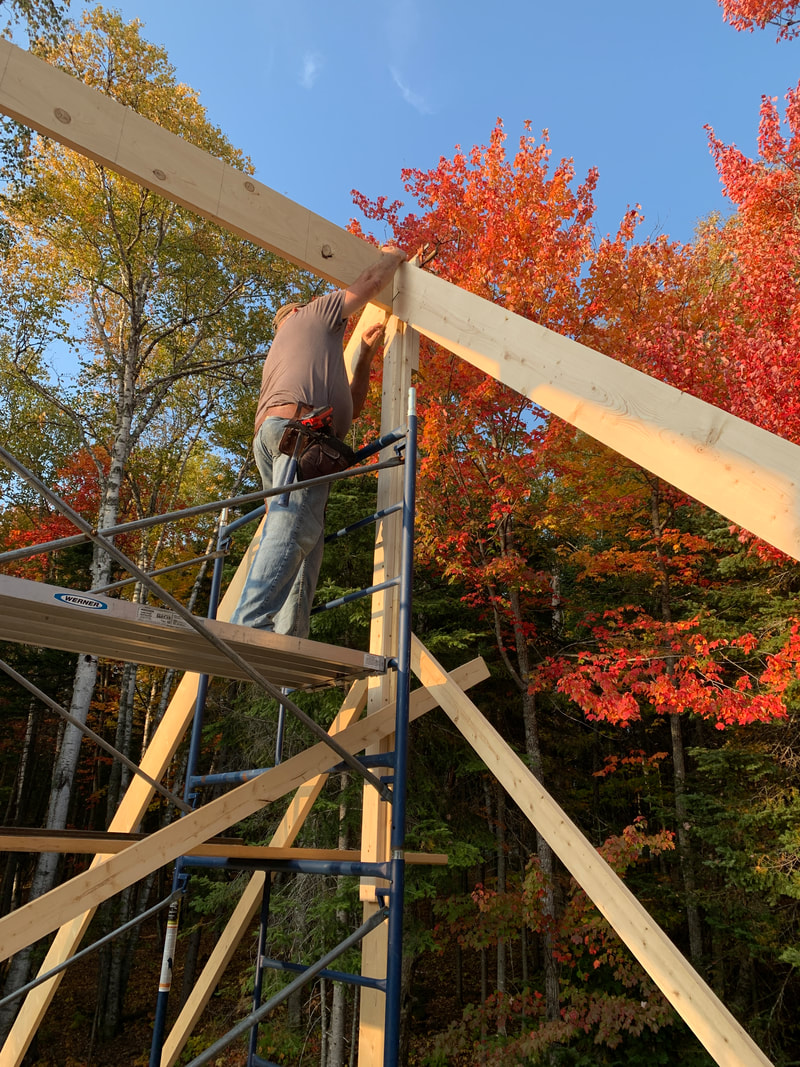 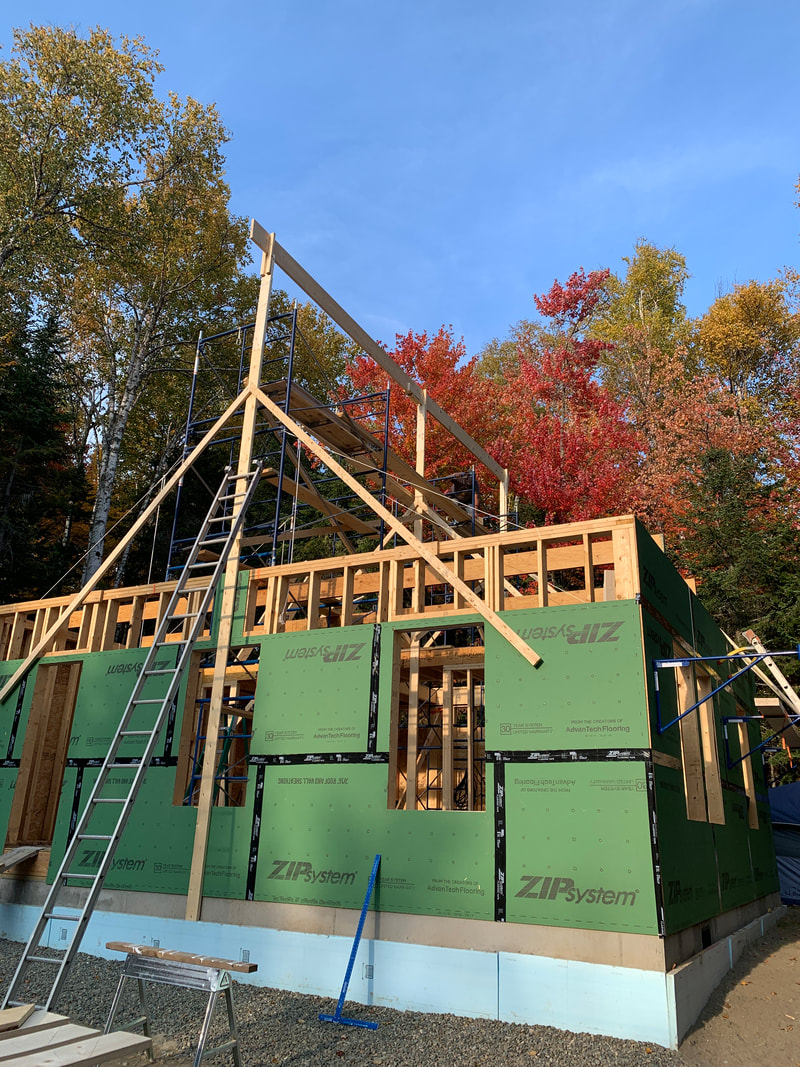 The ridge beam and rafter measuring took time to get right, but it was important that we get it exactly to where we needed it to. In the pic below, I spent the first night in the "bedroom" 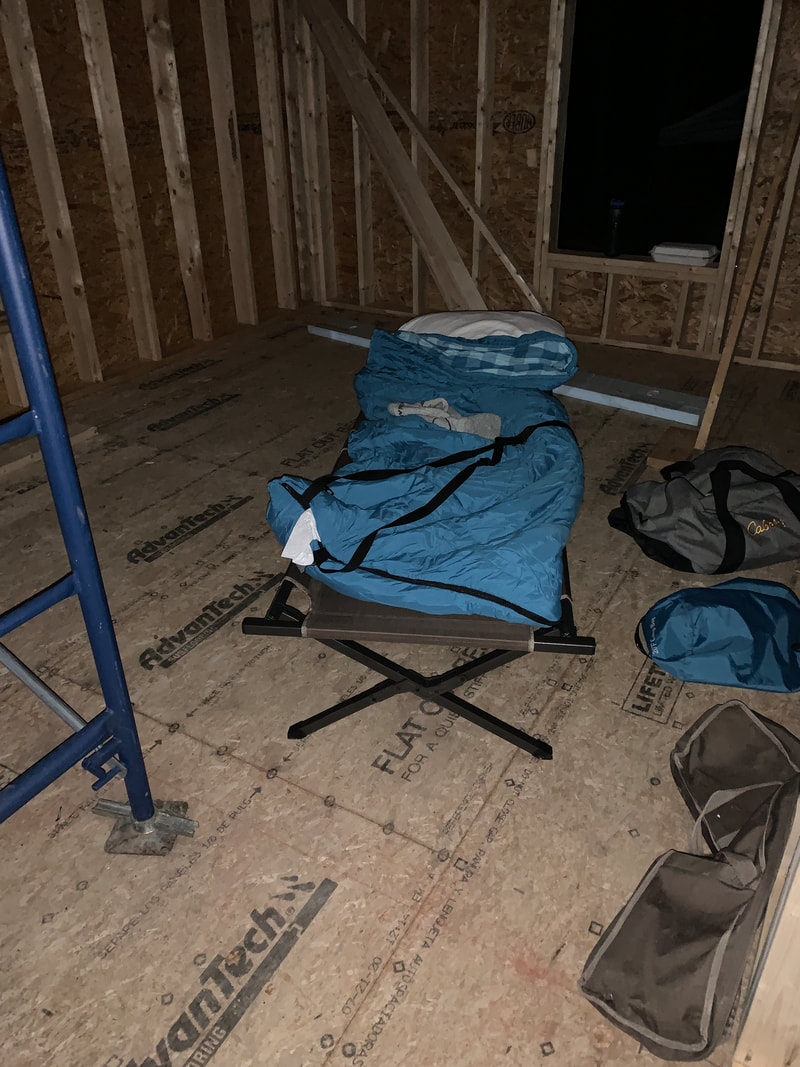 Before we started the rafter install, it was important that we get our staging right. We bought these wall mount brackets which came in huge for passing up rafters to the ridge. 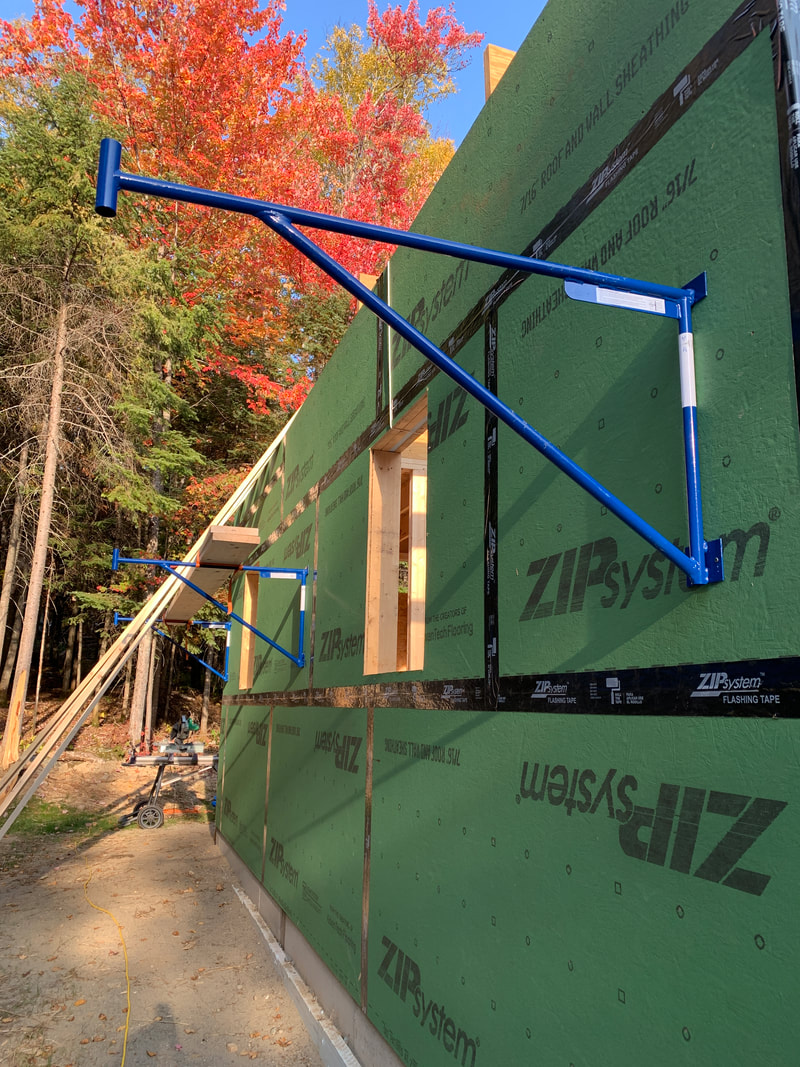 The first step was to cut 40 rafters. This isn't bad because once you get one made correctly than you use it a prototype for the rest of them. I watched John do this, but wasn't exactly sure how he got the measurements. Putting the rafters up on the back half of the camp was pretty easy because I could stand on the floor and hoist them up to John, who nailed them into the ridge beam. 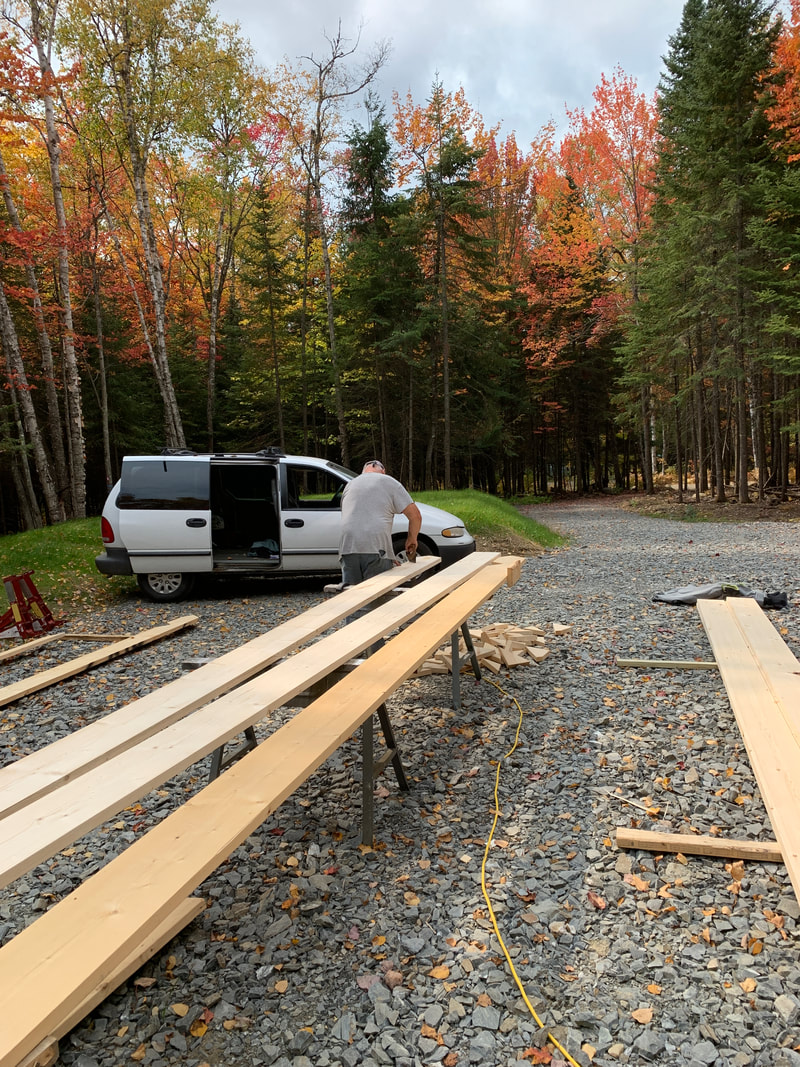 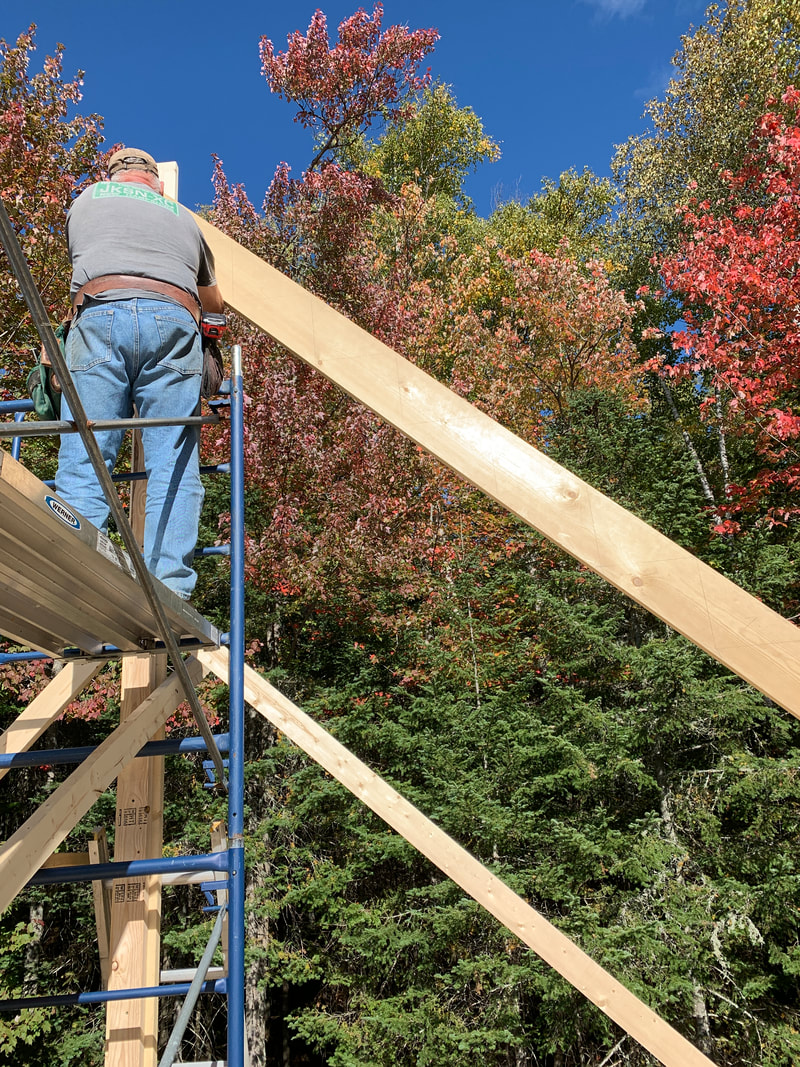 Once we got the back half of rafters on, we had to figure out a way for me to hoist the rafters up from the staging on the side of the camp all the way to the ridge. These were just over 21 feet long each, so it's not easy lifting them from the top of the outer wall to the ridge. Notice John built a nice railing for his staging at the top for added security. 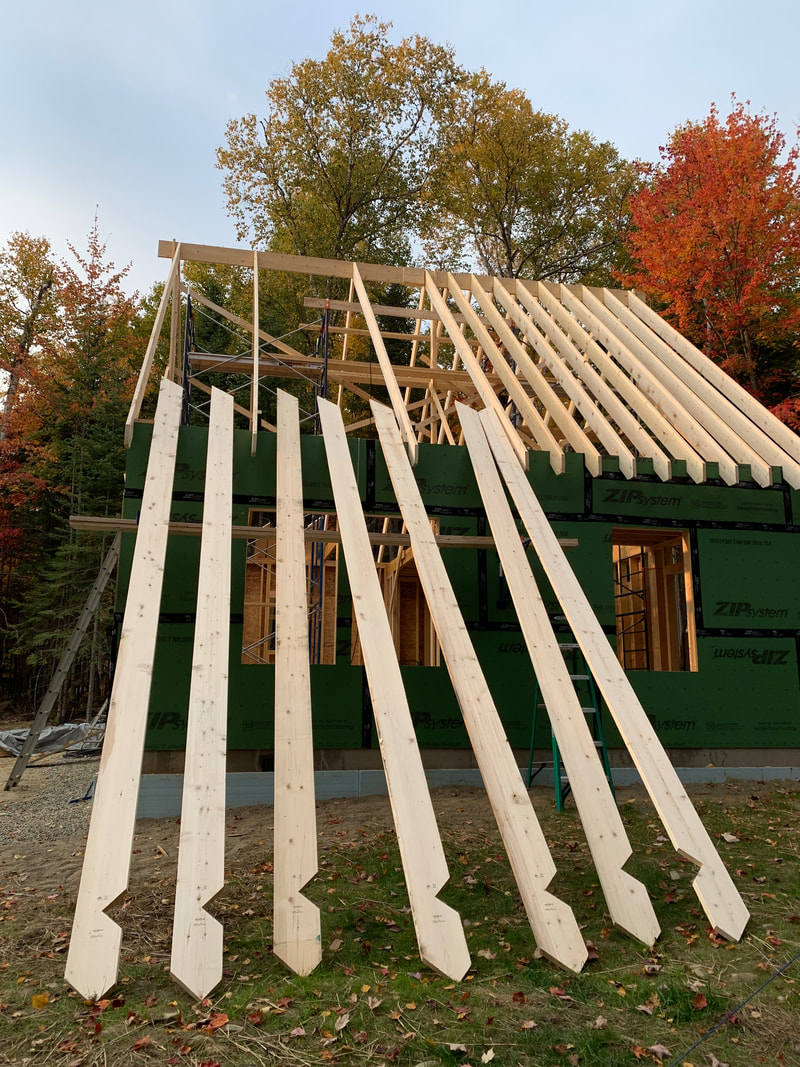 John came up with this great idea to put a clamp on the board and tie a slip knot around it with a rope. I fed the rafter up the side of the wall from the side staging and he pulled it with a rope. He nailed in the rafter, or used screws when the other side was nailed in because they're easier to angle and can come out, then he put the clamp back on the rope and threw it back to me. This process took a long time, but we got the job done! 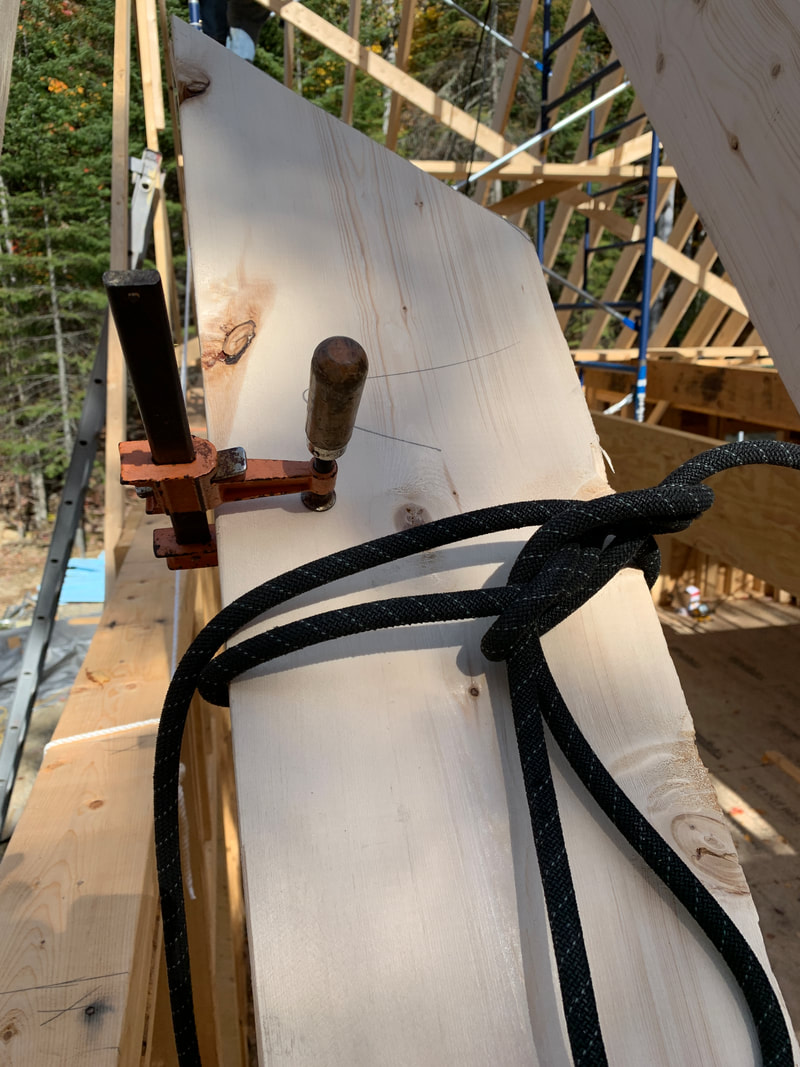 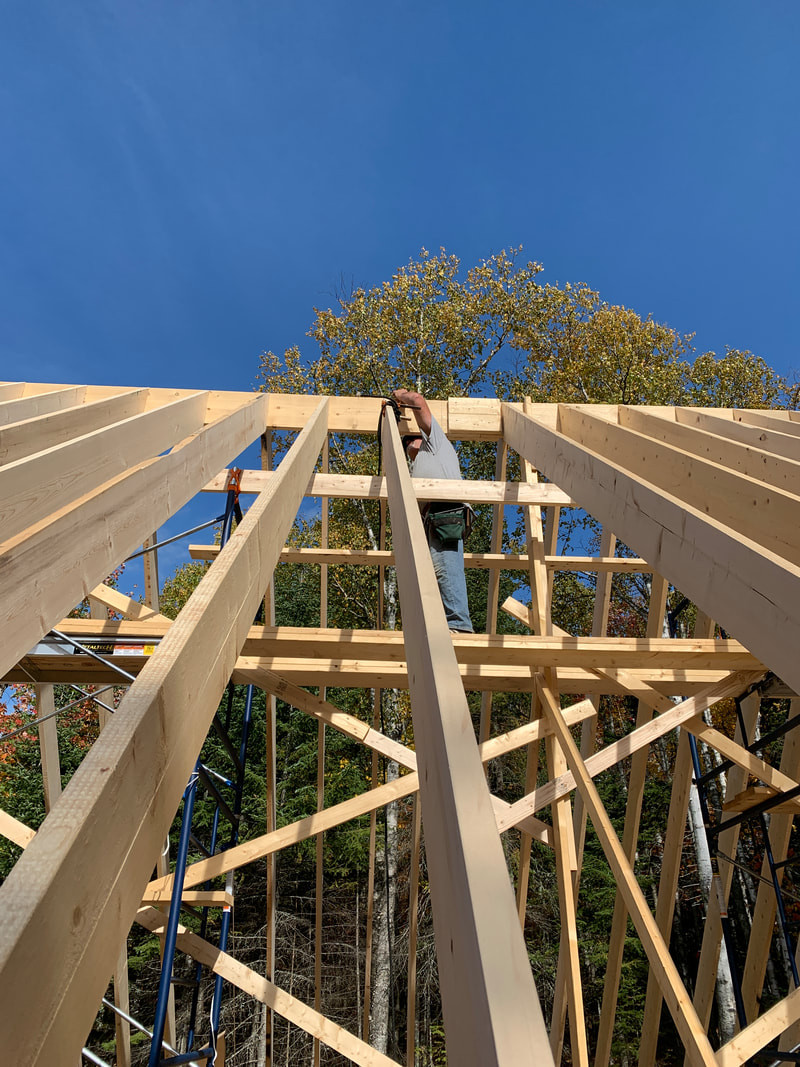 We measured out the rafters to include that two of them would be right next to each our LVL beams running across the first half of the camp. This just helps tighten them up a little bit and bring everything together. We through bolted and then shaved off the part of the LVL sticking out to match the angle of the rafter. 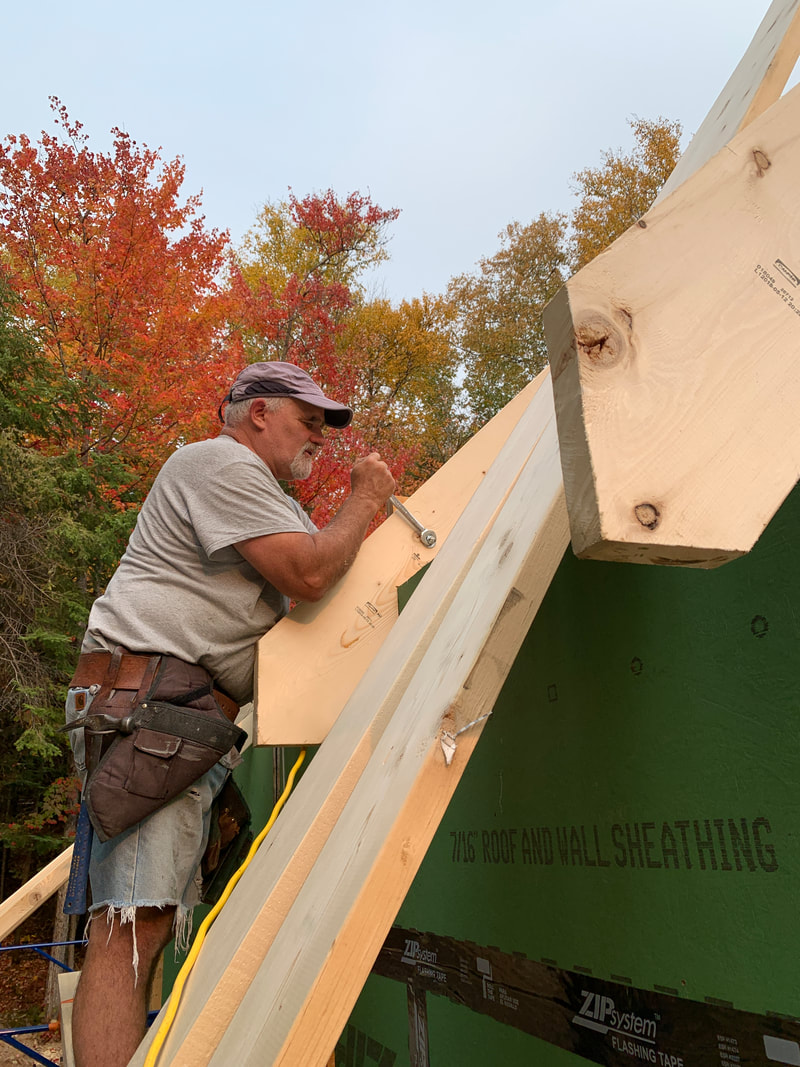 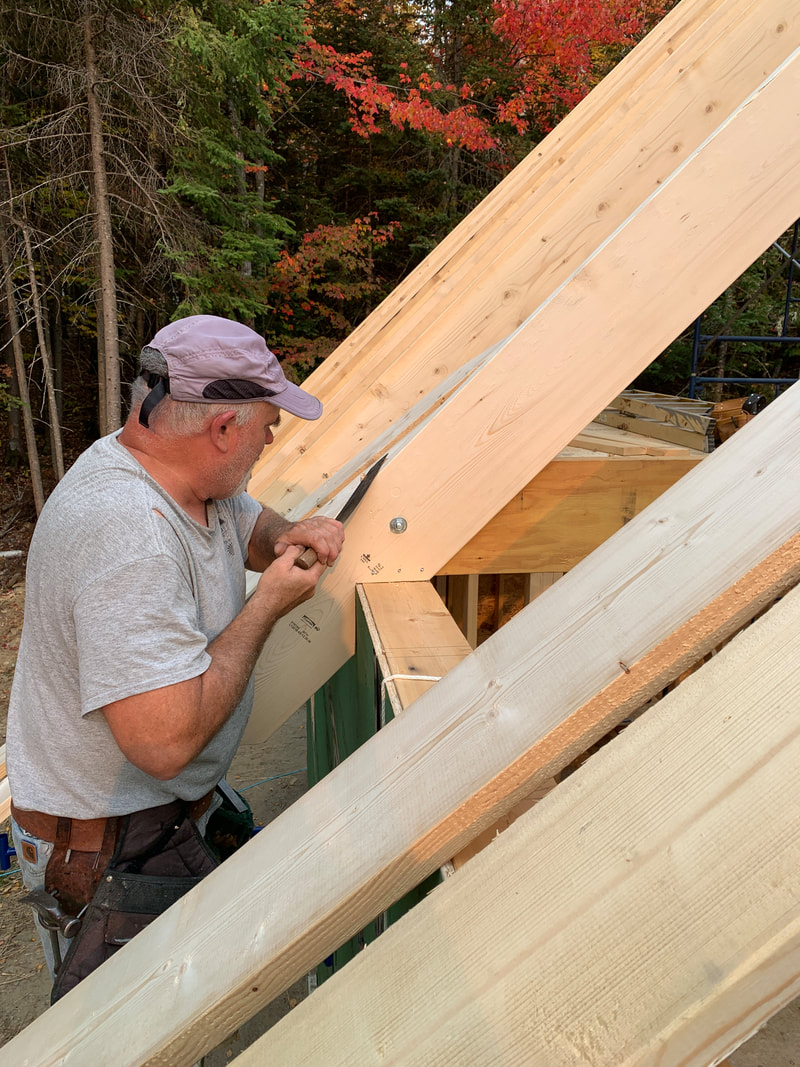 All in all, it took us about 2 ½ days to cut the rafters, put the ridge beam up, and nail in all 40 rafters. Not too shabby for a two guy crew with one guy not knowing what he's doing!! Next it's on to the plywood and underlayment. I get to learn all about the world of pulleys and rope safety in a few days :) 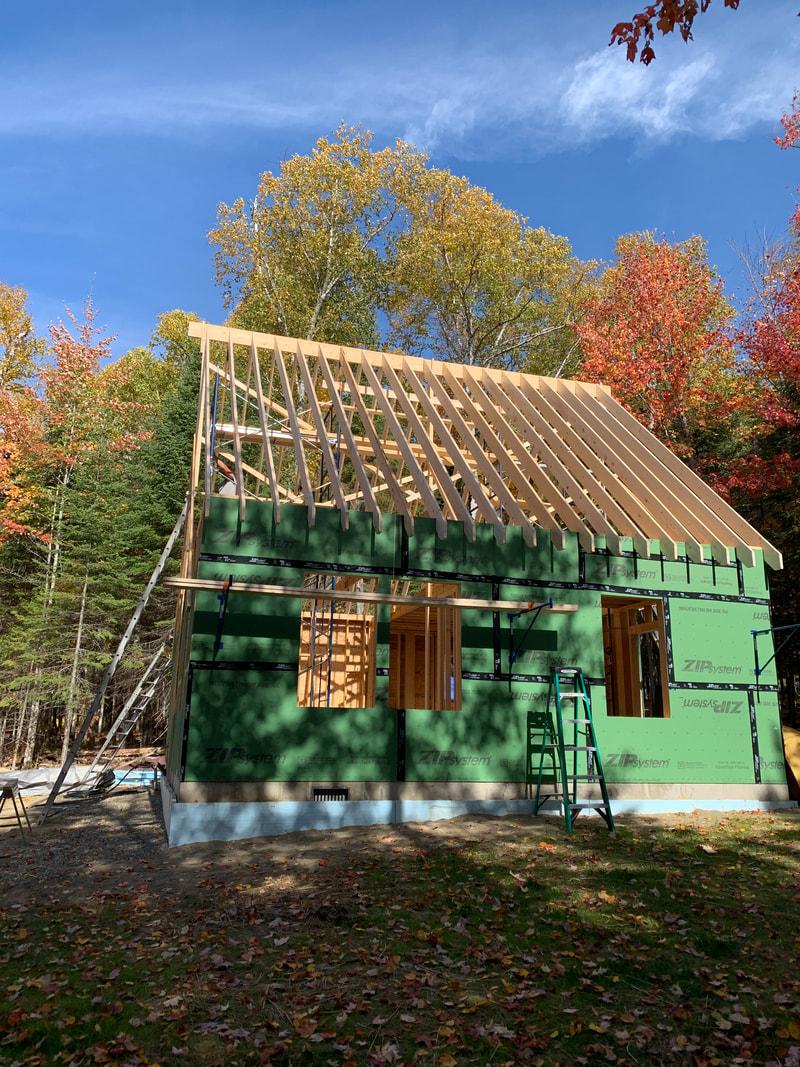 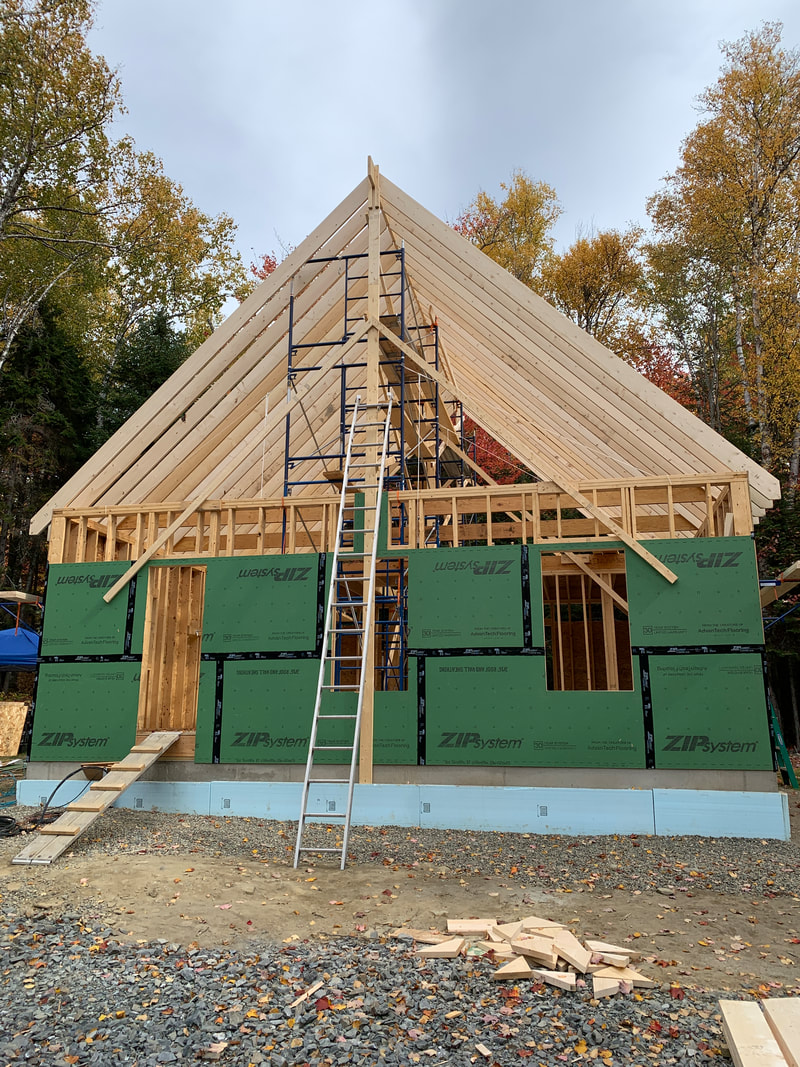
0 Comments
Leave a Reply. |
AuthorAaron Broaddus is a passionate fly fisherman and a Maine guide. Archives
February 2023
Categories |
 RSS Feed
Headin' North just always feels right